Sculpt terrain, paint the dirt, set the lights, drop the gates and
route the AI — then export and ride. This is the complete field manual for the
MX vs. ATV Unleashed Track Editor.
The Unleashed Track Editor allows you to create a track that can be loaded and
played with the MX vs. ATV game. You can create the terrain, color it as you like,
add objects such as starting gates and rocks, and define paths for the
computer-controlled riders to follow. You can then export the track and load it
inside the MX vs. ATV game in the same way you would with the built-in maps.
Additionally you can trade tracks with your friends, or download other people’s maps
and play either locally or with others online.
B
What can’t you do with the Unleashed Track Editor?
The Unleashed Track Editor is a very powerful tool and allows you to quickly and
easily create very rich and detailed tracks. However, there are some limitations.
You cannot add new models to the game engine, such as new vehicles or new in-game
objects. The game A.I. (Artificial Intelligence) cannot be modified, and thus for
single-player tacks, you must take into account the play style of the
computer-controlled opponents. New skybox textures cannot be created; you must use
one of the existing in-game skyboxes. Finally the physics engine cannot be modified,
so unfortunately you cannot create a map with lunar gravity.
C
Sections of the Track Editor
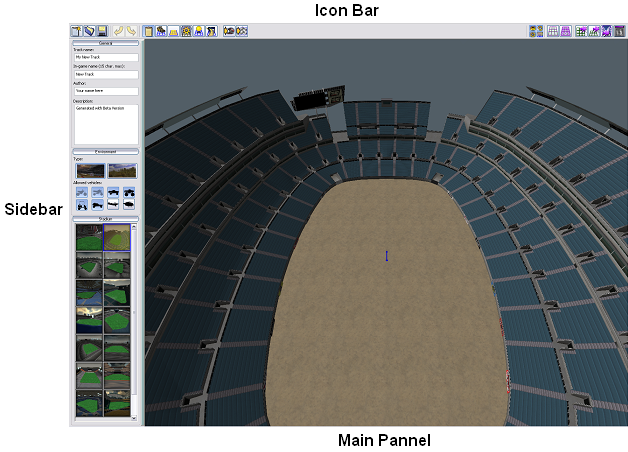
Icon Bar
This bar is located along the top of the screen. The buttons on this bar
generally control global options such as loading and saving, or changing the
current sidebar.
Sidebar
The bar located along the left side of the screen is the Sidebar. The
currently active sidebar determines what aspects of the track can be modified.
Usually it allows the selection of tools that can be used in the main panel.
Main Panel
The main window of the display is the Main Panel. This is where the track is
displayed. When a tool is selected, you would click within this panel to apply
it.
D
Step One: Track Information
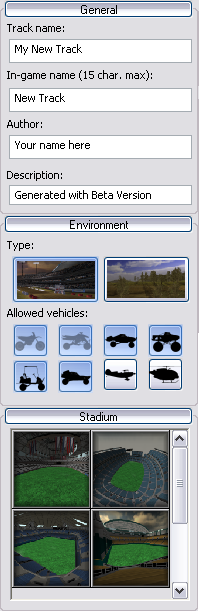
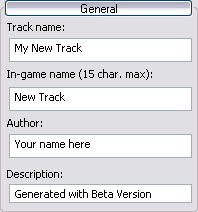
When you first open the Unleashed Track Editor, the “General” sidebar will be
active. Here you can enter information about the track including the name of the
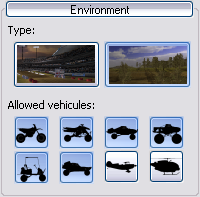
track, in game track name, author as well as a description. The type of track
can also be selected (either stadium or outdoors), and different types of
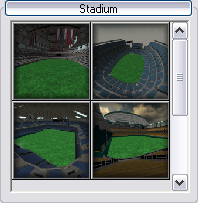
vehicles can be allowed or disallowed. When in stadium mode, the bottom rollout
will allow you to choose one of the pre-made stadiums. In outdoor mode, the
bottom rollout allows you to change the scale of the terrain and also equalize
heights between the track and perimeter sections of the terrain.
E
Step Two: Terrain Creation
The “Terraforming” sidebar allows you to manipulate the physical aspects of the
terrain, such as adding hills or jumps. To activate the “Terraforming” sidebar,
select the icon with the bulldozer in the icon bar. When this sidebar is active,
you are able to modify terrain in the main panel by clicking with the left mouse
button.
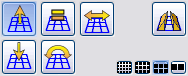
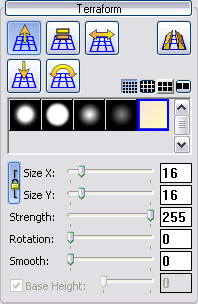
To manipulate the terrain you can use the icons from the Terraform rollout (below).
When active, they will raise, lower, level, smooth, level to base height or add
preset shapes to the terrain. This is explained in more detail in the Detailed
Documentation section of this help file.
Changing the shape of the brush can be selected directly below the Terraform icons.
Upon selecting a brush you can change its size, strength, rotation and smoothing
using the slider bars below the brushes.
F
Step Three: Terrain Coloring
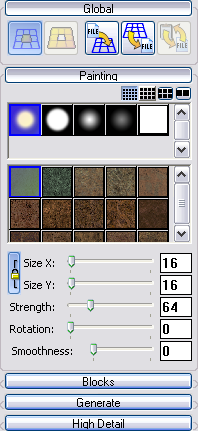
To assign color to the terrain (painting) you must first select Painting, the
icon with the terrain picture on the icon bar. You can paint areas of the
terrain with different textures (or solid colors) so for example you could add
some grass to a valley or paint a mountain with a stone texture.
To begin, select a brush from the first section under the Painting, and then a
texture or color from the second section below the brushes. You can now left click
anywhere in the main panel to begin painting the texture on the terrain.
Custom textures can also be imported by opening the Blocks section at the bottom of
the sidebar. This would allow you to add any texture you have created on your track
for example a helicopter pad. For additional information see the Detailed
Documentation section of this document.
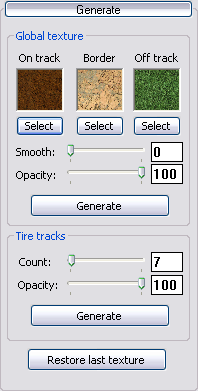
The Generate rollout can be used to automatically color the terrain for you. For
example, you can select a dirt texture for the track and a grass texture for the
rest of the terrain.
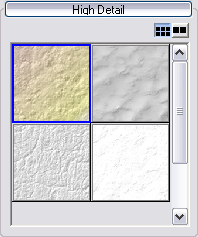
Finally, the High Detail rollout enables you to add a secondary texture on top of
your existing texture. The pattern selected will be tiled over the texture that you
have created, adding more fine-grained detail to the ground. It is important to note
that the detailed texture will only be visible in-game, so you will have to load the
map inside the game itself to see the result of this change.
G
Step Four: Skyboxes, Lighting or Fog
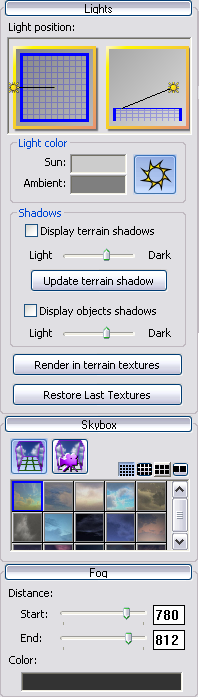
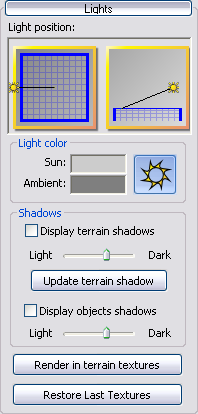
The Lights rollout allows you to control several aspects of the way lighting is
rendered. The top two icons allow you to position the sun, the first box allows
you to set the horizontal angle of the sun, and the second allows you to set the
elevation (and vertical angle) of the sun. The color of the sun and the color of
the ambient light can be changed with the swatches just below.
In the shadows section, you can enable shadows for the terrain and for the objects
on the terrain. These shadows will not be visible in-game until you press the
“Render in terrain textures” button. This button takes the shadows and adds them to
the terrain texture so that they can be displayed in-game. If you want to undo the
shadow render, you can restore the original terrain texture by using the “Restore
Last Textures” button.
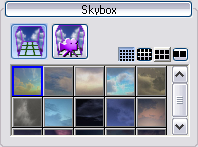
Assigning a “Skybox” in the Unleashed Editor is easily done. A “Skybox” is a
large textured cube around the track that simulates having a sky. First to active
the Light, Sky and Fog sidebar select the icon with the box on three sides of the
ground on the icon bar. After changing the skybox, make sure to change camera mode
with the camera icon above the images (right) so that you can view the selected
skybox.
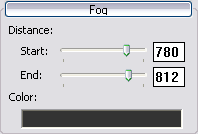
The section at the bottom controls the distance of the fog, as well as its color.
Using the slider bar and the color swatch will change those settings.
H
Step Five: Adding Objects
The world can be populated with a large number of inanimate objects. These will
add additional life to your track and include such items as traffic cones,
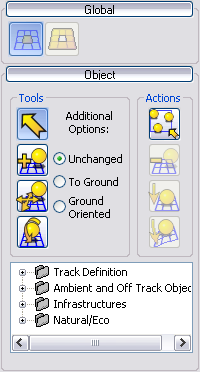
crates and rocks. To add objects first select the “Objects” icon in the icon bar
(Ball icon). This will change the sidebar to the object sidebar.
Then, using the object buttons under tools (below) you can select and displace,
add, move, and rotate objects. For additional information on the tools Additional
Options please refer to the Detailed Documentation section of this document.
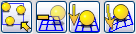
The other four icons (below), in the actions section, allow you to select all
objects, delete all selected objects, or align all selected objects with the ground.
I
Step Six: Activity and Adding Waypoints
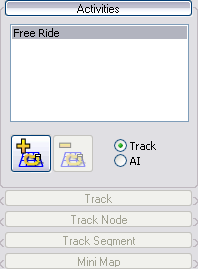
The Activities sidebar can be accessed with the Activities button on the icon
bar. The first section of the sidebar allows you to add new activities to the
track. By default there is always at least one Free Ride activity. This activity
allows you to ride around the map solo with no constraints. Multiple activities
can co-exist on the same track. For additional information on the additional
track types please refer to the Detailed Documentation section of this document.
J
Step Seven: Saving, Exporting and Testing
The final step of the creation of a track is to save, export and test it. The
first of these steps is to save the track using the Save button located on the top
icon bar (upper left). This will save the track in the editors own format to allow
it to be edited additionally in the future.
Next is to export the track to the format that the game will use to play the
track. In order to do this the track is to be exported and you can do so by
clicking on the Export Track button on the icon bar (Middle bar area).
The last step will allow you to quickly test your map inside the editor and that
can be done by clicking on the Test Track button on the icon bar (located just to
the right of the Export Track button).
Congratulations you have created your first track. For additional information
please read through the Detailed Documentation section below.
2
Reference
Detailed Documentation
A
Icon Bar
This is the bar located along the top of the Unleashed Track Editor. This bar is
broken into seven parts allow you to control the main elements of the editor. These
are detailed below.
NewUse this button to create a blank track.
LoadUse this button to load any saved tracks that are in the
Unleashed Track Editor format. Upon selecting this option you can select the
folder, and then the track file that you wish to load.
SaveUse this button to save tracks in the Unleashed Track Editor
editable format. The save format is *. mvaproject for tracks.
UndoSelecting this undoes the last action carried out. You can
undo action up to 10 previous actions.
RedoIf an action has been undone, it can be redone with this
button. This has the same limitations as the Undo feature.
GeneralSelecting this will activate the General sidebar. This
sidebar allows the properties for the track to be set. For additional details
see the General Information Sidebar section below.
TerraformingThis activates the Terraforming sidebar. This allows you to
edit the height and depth of the terrain to create the track. Details of this
sidebar are described in the Terraforming Sidebar section below.
Light, Sky and FogSelecting this activates the Light, Sky and Fog sidebar.
Within this sidebar you can select the skybox and set up lighting and fog
settings. Additional details are described in the Light, Sky and Fog Sidebar
section below.
PaintingThis button will activate the Painting Sidebar. You can
paint the terrain with various textures and brushes. For additional details
see the Painting Sidebar section below.
ObjectsTo manipulate Objects select this button and it will
activate the Objects Sidebar. You can add, remove and reposition objects
within the tracks on the sidebar. Additional information is detailed in the
Objects Sidebar section below.
ActivitiesSelecting this activates the Activities Sidebar. This will
allow you to create and edit the waypoints the AI controlled riders will use
on your track. Additional detailed information is described in the Activities
Sidebar section below.
ExportThis button will export the level into a format which can be
read in by the MXvsATV Unleashed game, the tracks should be saved in the
\Data\UserTracks\ directory in the program folder. The file saved
with this function cannot be reedited by the Unleashed Editor. If you want to
save an in-progress track use the save command listed above. The save format
is *.pak for tracks that have been exported and can be run in the
game. To run a track that has been saved to the UserTracks directory, enter
the MXvsATV game and select “Single Player” from the main menu, then “User
Tracks” from the single player menu. Note: When a track is exported a unique
ID is generated. This ID changes every time you save the level, even if it has
the same name and track data. If you and your friends do not have the exact
same version of the level (with the same unique ID), you will not be able to
play the level together.
TestSelecting this button will launch the MXvsATV game and
automatically load your current track in free ride mode. This allows you to
get a feel for the terrain and lighting of your level, exactly as it will
appear later in-game.
StadiumToggle on or off the displaying of the stadium. This button
is deactivated in outdoor mode.
TrackToggle on or off the displaying of the track.
LightingToggle lighting on or off.
FogToggle the fog on or off.
Point GridTo toggle on or off the point grids select this option. When
toggled on it will allow you to see the points at the corners of the grid
squares, overlaid on the terrain.
Wireframe GridTo toggle on and off the wireframe grid, select this option.
When toggled on it will display the actual borders of the polygons, overlaid
on the terrain.
View AboveTo change the camera view to look down upon the track,
select this. This will move the camera directly above the terrain, facing
down.
View IsometricSelecting this will reset the camera to the default
position.
View SkyboxTo view the skybox that you have set for your track better
select this button. This will position the camera at a lower angle to view
both the track and the skybox.
Toggle View 2DThis button toggles on and off a small helper window that
gives you a two dimensional overview of either the terrain height map or the
painted texture.
B
General Information Sidebar
This sidebar is divided into four sections called rollouts. The first rollout
is the General rollout this allows you to enter information about the track. The
track name is displayed only inside the Unleashed Editor, while the In-Game
track name is visible when the track is selected for loading inside the game.
The author name and the description are also visible while the track loads in
the game.
The next rollout is the Environment rollout this is used to change the type of
track that will be created, this can be either Super Cross or National.
Additionally you can specify the type of vehicles that are allowed when the
track is played.
In the Indoor tracks the area outside the playable track area is the Stadium.
The stadium rollout allows you to select which of the pre-built stadiums you
wish to have around your track. The display of the stadium can be toggled on and
off with a button on the Icon Bar.
The main difference between the Indoor (Super Cross) and Outdoor (National)
tracks is that when an Outdoor track is created, you must also create the
terrain for the areas visible outside the playable track area. In the Indoor
tracks the area outside the playable area is the Stadium. When the outdoor mode
is active the Stadium rollout becomes the Outdoor rollout and exposes additional
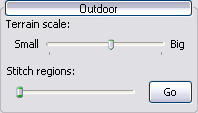
options. The Terrain Scale slider controls the size of the physical size that
the terrain represents. For example, if you add an object to the terrain and
then change the terrain scale, the object will become smaller because the
terrain now represents a larger area. Region stitching is used to equalize
heights between the edges of the center terrain and the surrounding landscape.
C
Terraforming Sidebar
The Terraforming sidebar allows you to modify the terrain to create the track. The
process of creating an Outdoor track (National) differs slightly from creating an
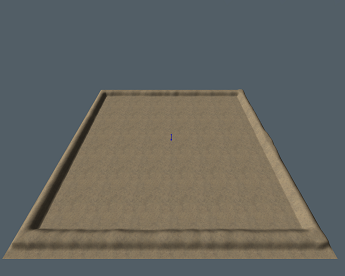
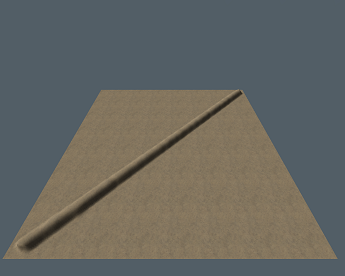
Indoor track (Super Cross). Both types of tracks include the Inner Terrain (track)
the main area that is driven by the vehicles. In addition an Outdoor track
(National) also requires Perimeter Terrain to be created that surrounds the Inner
Terrain track. This additional Perimeter Terrain is not necessary when creating an
Indoor track (Super Cross) as it is surrounded by a pre-existing stadium that is
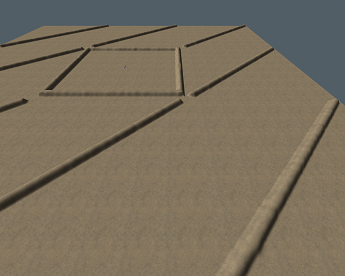
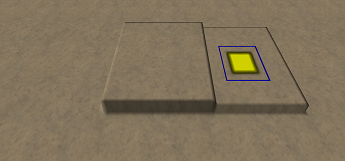
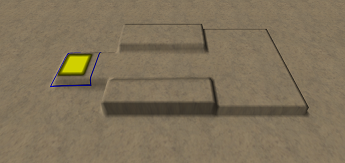
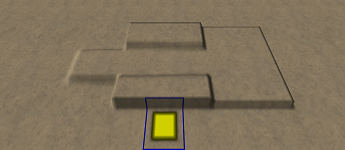
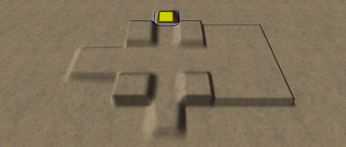
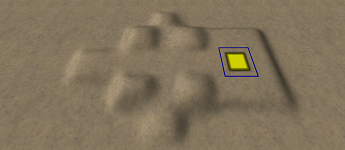
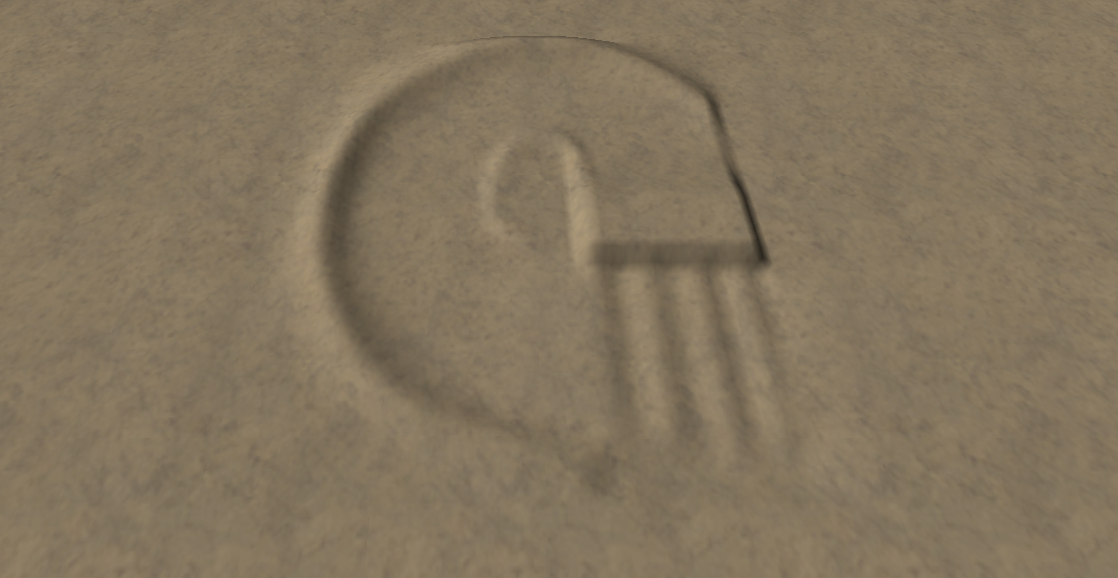
selected as you start the track. To better illustrate how the Inner and Perimeter
Terrain pieces work together see the below images:
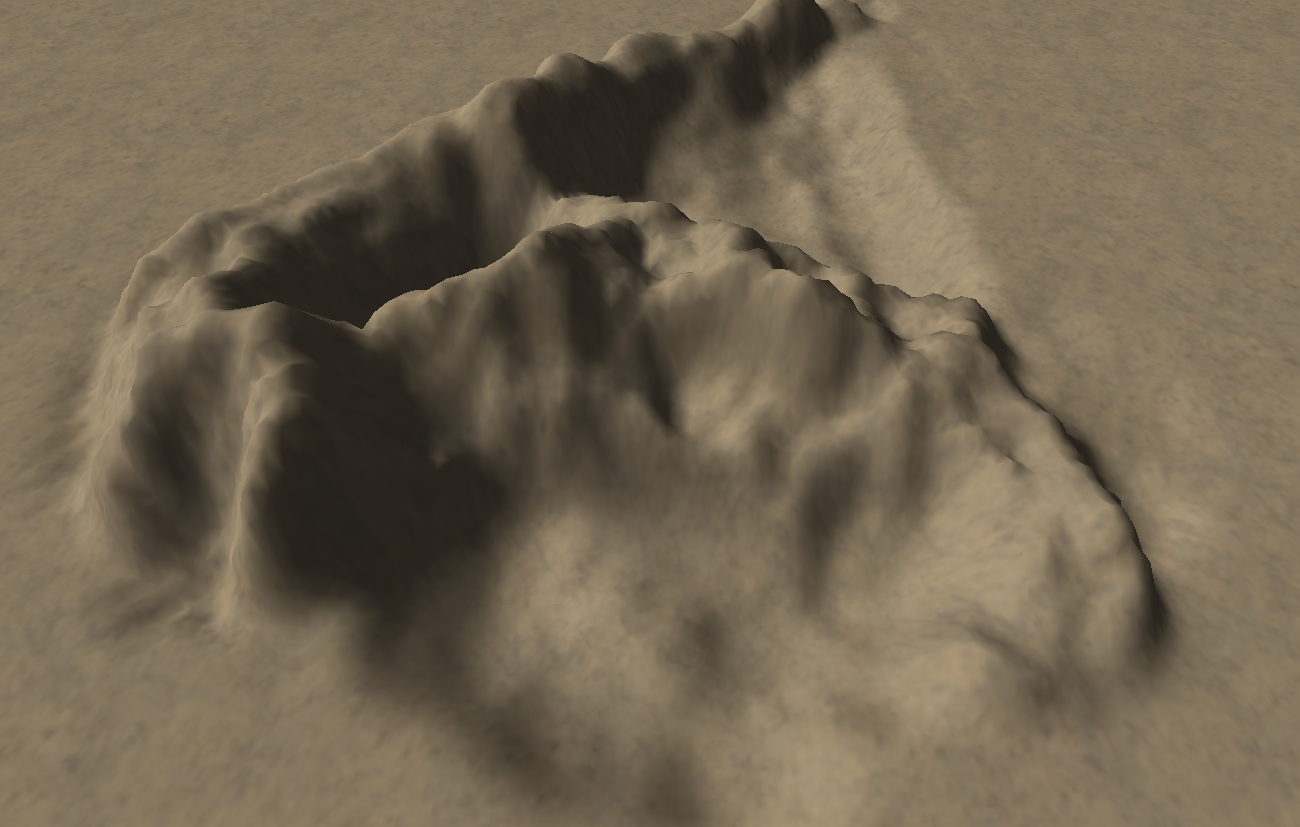
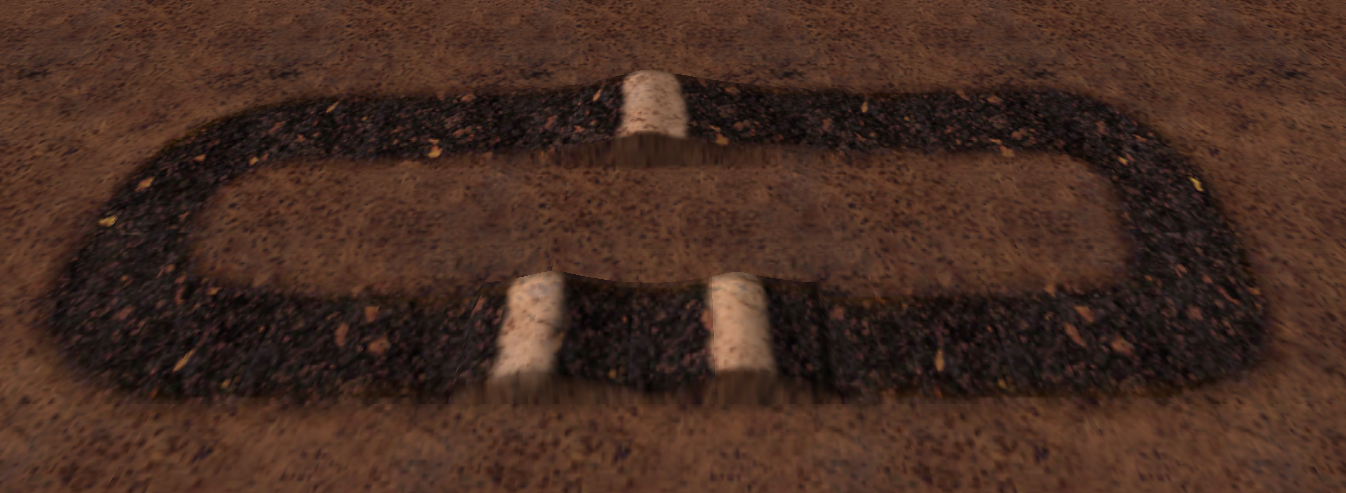
Inner Terrain (track) Perimeter Terrain Combined
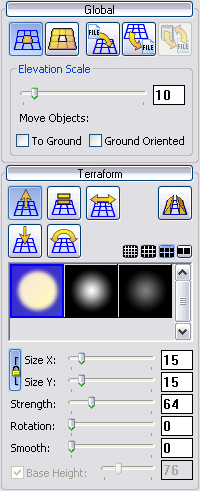
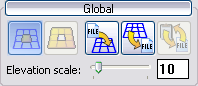
The first rollout is used to change the current section of terrain being edited,
to import or export terrain to file and finally to change the scale of the terrain
elevation.
This Landscape is created in exactly the same way as the Central terrain, to
modify either element use the terrain edit buttons (left). The yellow area in the
icon represents the area of the track that you are editing. These buttons are not
active if you are creating an Indoor track. Once created, both parts of the
terrain can be viewed simultaneously by switching to any sidebar. This is with the
exception of the Terra Forming and the Painting sidebar.
The next set of icons allow you to export or import terrain. These functions use
the following file formats: *.bmp, *. png or *. tga file. These are
typically grey scale image that represent the height data of the terrain. Using
such and image darker color will create lower terrain areas while lighter color
will be your higher elevation points. Upon using either of these functions any
painting, objects or waypoints would be left in place; they only export or import
terrain height data.
Elevation Scale
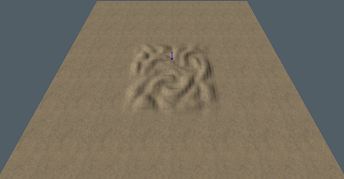
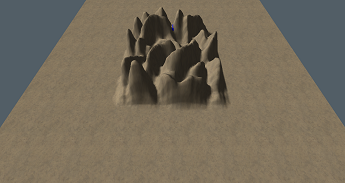
The last element of this rollout is the Elevation Scale slider. This affects
the degree to which the terrain is affected by the height map. Use lower values
if you want short smooth hills and higher values to create spiky peaks. The
slider will affect all of the terrain. It is not permanent and can be changed at
any time. Additionally it not only affects existing terrain but also future
terrain being created, see below:
Scale 10 Scale 100
The second rollout under the Terraforming Sidebar controls how you will paint
the terrain. Along the top the first four buttons allow you to Raise Terrain,
Lower Terrain, Equalize Terrain, Smooth Terrain, Level to Base Height and Use
Pre-Made shapes.
The larger middle section contains the available brushes which can be used.
Additionally there are a small set of buttons (right) that allow you to change the
size of the brush icons.
Finally along the bottom there are sliders which affect the way the brushes are
applied (more details below).
Size X/Y
This slider controls the width and height of the brush. The X and Y values can
be linked together with the lock icon directly to the left of them.
Strength
The magnitude of the terrain raised, lowered or smoothed is controlled by this
slider.
Rotation
This slider is used to change the orientation of the brush.
Smooth
The level of smoothing applied is controlled by this slider (see pictures
below).
Base Height
The Preset Shapes tool and the Level tool enable this slider, the way it
affects each tool is explained below.
Raise/LowerWhen one of these buttons is active, using the brush
selected will either increase or decrease the height of the terrain. To raise
or lower the terrain, first select the relevant button and left click on the
terrain. Keeping the brush in one area longer and holding down the left click
will add to intensity of the deformation.
LevelThis button can be used to extend a region of terrain at a
specific level (height). For example this could be used to extend the size of
a plateau or to level terrain between two sides of a valley. To use this tool,
left click and hold the left mouse button on the area you want to extend, as
you paint with the button still held down, terrain under the mouse will be
raised or lowered to match the region where you first selected the
terrain.
Level to base height
When painting with this brush, the area under the cursor is set to an exact
level (specified with the “Base Height” slider at the bottom).
SmoothThe smooth tool is used to reduce sharp edges and sudden
changes in height. Select this tool and left click on with the brush on the
area you wish to smooth. The size and intensity of the smoothing is affected
by the sliders below the brushes.
Preset ShapesWhen this icon is selected, the list of brushes is replaced
with a set of fully constructed shapes. You can use these shapes for many of
the common sections that are present on a track. As with the brushes each of
these shapes can be modified using the sliders at the bottom of the sidebar.
The “Base Height” height option under the sliders is also now available. When
this is active (checked) the ground is cleared before the shape is put down
and is done so at the base height level. The slider attached to this option
determines the base height. When this is not active (unchecked), the pre-set
shape acts exactly like a regular brush, it adds to the height of the terrain
it is placed upon.
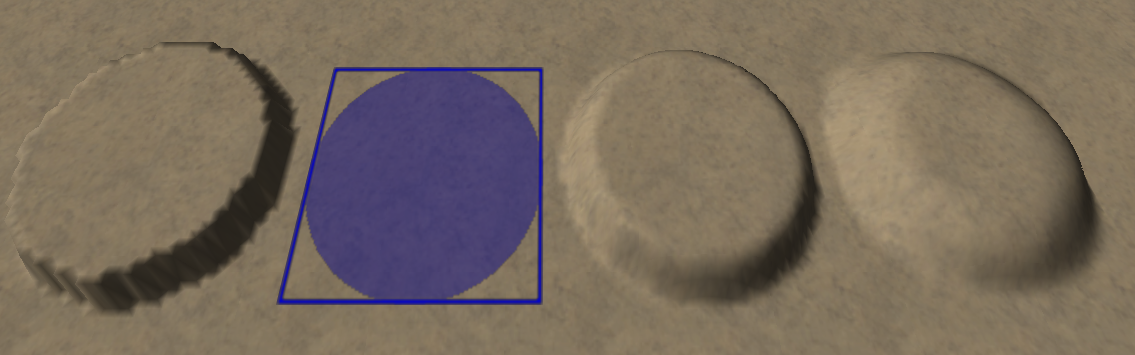
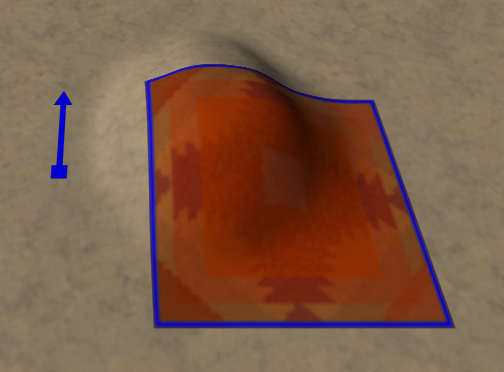
Smoothing can be applied to the brush shape with the
Smoothing slider shown above; the following screenshot illustrates the effects of
smoothing. The three hills were created with the same solid round brush, but with
progressively higher levels of smoothing.
D
Painting Sidebar
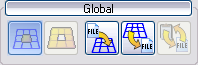
This rollout behaves identically to the global rollout in the “Terraforming”
sidebar. You can switch between the center terrain and the landscape, as well as
import and export painted terrain.
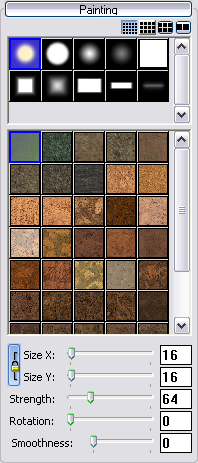
This rollout is once again similar to the corresponding rollout in the
“Terraforming” sidebar. This is broken into two main section, brushes and
textures. The brushes in the top half are all the different shaped brushes you
can apply the texture with. These can be modified with the slider bars at the
bottom. Below the brushes are the textures that you can use. Upon choosing a
brush and texture as you left click on the terrain the texture will be painted
down. Below the texture are the following brush options.
Size X/Y
This slider controls the width and height of the brush.
Strength
The density of the texture as it is painted is controlled here.
Rotation
The rotation of the brush is controlled by this option.
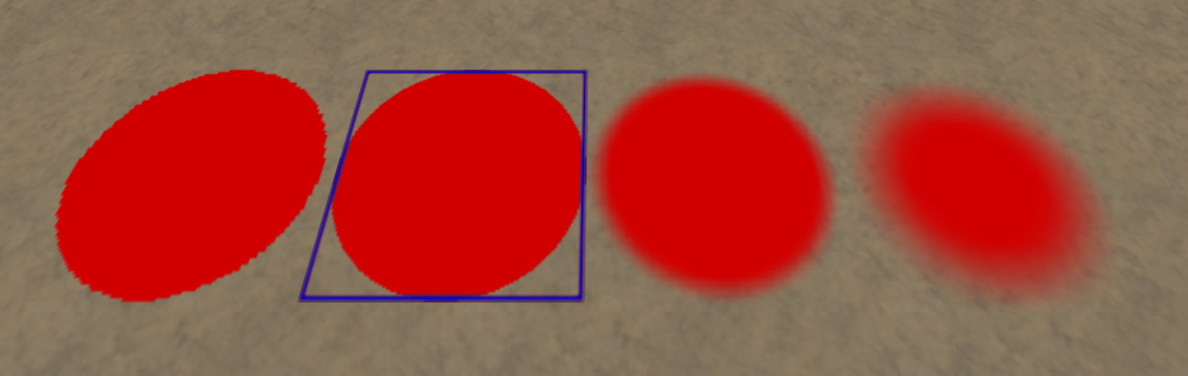
Smooth
The level of smoothing applied is controlled by this slider (see picture
below).
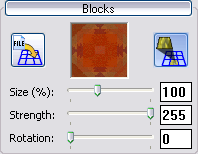
The blocks rollout allows you to paint with an image loaded from disk. You can
simply click on the load button; select the image and then paste in on the
terrain. The Size, Strength and Rotation sliders behave in the same manner as
for regular painting. The second button allows you to place a block on the map,
which allows you to select the currently loaded block as the drawing tool
(without re-loading the image file).
The Generate rollout is an extremely handy timesaver and is a perfect way to
make a first pass at texturing. It automatically colors the entire terrain for
you, within a certain set of parameters. For example you chose three main
textures, one for the center of the track, one for the edges of the track and
one for all the terrain that is outside the track boundaries. You can then set
the smoothness of the generation, which will add a smooth gradient between the
different areas, and also set the opacity, which determines how much of the
underlying terrain is kept visible. To be able to use this tool properly you’ll
need to already have laid down your track segments.
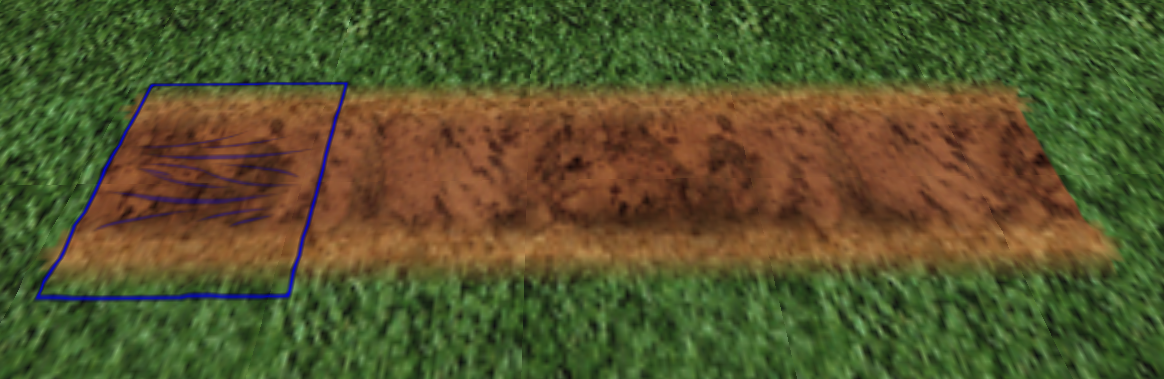
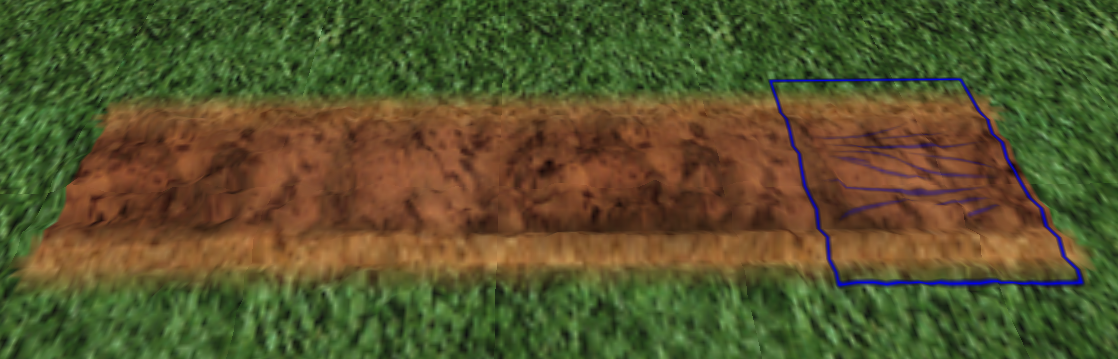
The tire tracks segment is used to add tire tracks along the track segments; you
can vary the number of tracks, and their opacity.
If you need to undo either of the two operations, you can do so with the “Restore
last texture” button.
The “High Detail” rollout enables you to add a secondary texture on top of your
existing texture. The pattern selected will be tiled over the texture that you
have created, adding more fine-grained detail to the ground. It is important to
note that the detailed texture will only be visible in-game, so you will have to
load the map inside the game itself to see the result of this change.
E
Light, Sky and Fog Sidebar
The first of the rollouts controls the lighting for the track. The first part
of this is the light position, and this is set in the first two boxes. You can
change the direction and distance with the first window by moving the sun icon.
The second box will control the angle and height of the sun by once again moving
the sun.
The next of the light settings is to set the light color. This is done in two parts
setting the Sun and Ambient. As you select either it will bring up a color swatch in
which you can set the color of either of these light colors. The icon of the sun to
the right of the color turns the sun on or off.
Shadow is the next section below under the lights rollout. This is in two parts:
terrain and object shadows. Both can be toggled on and off by clicking on the
checkboxes above the slider bars. The slider bars control the intensity of the
shadows. Every time you change the terrain shadows intensity you will need to click
on the Update Terrain Shadow button.
When you are satisfied with all the shadow and light settings click on the “Render
in Terrain Textures” option and the shadows will now be part of the texture on the
ground. You should do this after you have painted your track.
This rollout allows you to choose the “Skybox” you wish to add to your
environment. A “Skybox” is a large textured box around the track that simulates
having a sky.
The first of the two buttons in the top right corner toggles the skybox on or off.
The second will change the camera view so that the top of the skybox is easily
visible.
If you are applying a skybox, but the camera is at a downward angle, the sky will
appear to be only a single flat color because only the bottom of the skybox will be
visible. The four smaller icons affect the size of the skybox. You can preview icons
just below them.
The final rollout on this sidebar is the fog rollout. This allows you to apply
distance fog to the track. Setting the fog distance can add atmosphere to a
track. This is controlled by two slider bars that set the start and end distance
of the fog. Below the sliders is the option to set the color of the fog to match
the environment or mood of the track. Selecting this will bring up a swatch of
colors to choose from.
F
Objects Sidebar
This sidebar allows you to place objects on the terrain and manipulate them. The
first rollout allows you to switch between Inner Terrain and Perimeter Terrain for
placement of objects on the Outdoor (National) tracks. The next rollout is for
placing and manipulating objects. Objects are selected in the folder view below the
icons and placed using a left click. For objects there are the following buttons
under the tools section
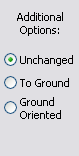
Select / Displace ToolTo select an object use this button. You can individually
select objects with a left click or drag select objects by holding down the
left mouse button and dragging over an area.
Unchanged
When displacing an object, its vertical height and angle of rotation are
preserved.
To Ground
Objects displaced while this option is selected automatically have their
height adjusted to that of the terrain directly under them.
Ground Oriented
Similar to the “To Ground” option, except that the objects are also rotated to
align their bottom with the slope of the terrain directly below them.
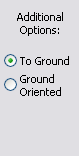
Add ToolWhen this icon is the object you have selected, it is added
to the world in the folder view below.
To Ground
Objects added while this option is selected automatically have their height
adjusted to that of the terrain directly under them.
Ground Oriented
Similar to the “To Ground” option, except that the objects are also rotated to
align their bottom with the slope of the terrain directly below them.
Move ToolWhen you have selected an object then selected this button
you can drag objects horizontally, in a singular fashion, or in groups.
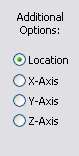
Location
Moving the mouse will displace the object horizontally.
X-Axis
The object will be displaced along the X-Axis (left/right).
Y-Axis
The object will be displaced along the Y-Axis (up/down).
Z-Axis
The object will be displaced along the Z-Axis (forward/back).
Rotate Tool: Selecting an object, and then this button, will allow you
to rotate the object along the Y Axis and change the facing direction of an
object.
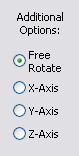
Free Rotate
Moving the mouse will rotate the object along all axes.
X-Axis
The object will be rotated around the X-Axis.
Y-Axis
The object will be rotated around the Y-Axis.
Z-Axis
The object will be rotated around the Z-Axis.
Select All ObjectsSelect this button to automatically select all objects in
the world.
Remove ObjectThis will delete the currently selected object(s).
Move Object to GroundTo move the objects to the ground level, select the object,
and then press this button.
Move Object to Ground
OrientatedThis button has the same effect as
the previous button, except that it also re-orients the object so that the
bottom of the object is aligned with the slope it is resting on.
G
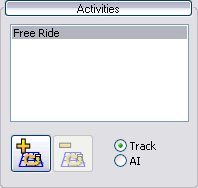
Activities Sidebar
The activities sidebar allows you to put the finishing touches on your map. The
list box allows you to select the types of races that will be active on your
map. The radio buttons at the bottom right toggle which type of track you are
editing. The “Track” setting allows you to edit the physical track that defines
the boundaries and starting/ending locations. The “AI” setting allows you to set
paths that the computer-controlled players will follow.
Add Activity: Add a new type of race to this track.
Remove ActivityRemove an existing type of race from the track.
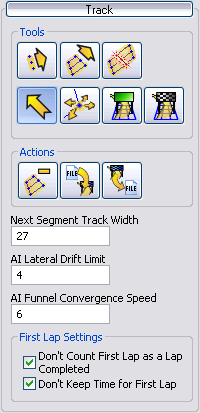
The track rollout allows you to lay down sections of track, connect them
together, manipulate them and add starting and ending gates. For a detailed
description of all the icons, see below.
Next Segment Track Width
Affects the width of track sections as they are laid down. Does not affect
existing track segments.
AI Lateral Drift Limit
Value
Amount that the AI will drift from center line.
AI Funnel Convergence Speed
Value
How fast the AI will converge onto the center line from the start.
First Lap Settings
Don’t Count First Lap as a Lap Completed
As stated, if checked, your first lap will not be counted.
Don’t Keep Time for First Lap
As stated.
Start a new segmentTo begin a new track, select this icon and click on the
terrain. This will place the first node. The “Add Node” tool automatically
becomes active after placing the first node of a segment.
Continue segmentThis tool is selected automatically after a new segment is
started. To add a new node simply click on the terrain where you would like to
extend the segment and the new node will be placed there. The nodes are joined
together automatically. When you are ready to complete a segment, hover the
mouse over the starting node of the segment until the segment snaps into
alignment with the starting node, then click with the left mouse
button.
Insert nodeThis tool allows you to insert a new node in the middle of
an existing segment. Simply hover the mouse until the new node appears, then
click the left mouse button to finalize it.
SelectWhen this icon is active, the mouse can be used to select
the track, or individual track sections. You can click and drag with the left
mouse button to change the location of entire tracks, or simply move the
individual nodes.
Edit NodesThis tool allows you to select individual nodes. This can be
useful to make fine-grained adjustments to either the track boundaries or
slight adjustments to the individual AI nodes.
Place start gateSelect this tool and then click on the track segment where
you want the start gate to appear. The position of the start gate will
determine where the Supercross race begins.
Place end gateSelect this tool and then click on the track segment where
you want the start gate to appear. The position of the end gate will determine
where a lap ends.
DeleteThis tool can be used to erase entire tracks, or to remove a
specific node from a track. To use it, select either an entire segment or a
single node in a segment and click the icon.
Import/Export TDFYou can use these buttons to save or load Track Definition
Files, which are simply the collection of track segments/nodes associated with
the current activity.
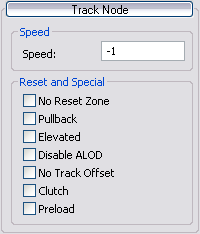
Speed: Amount in miles per hour that the AI will
attempt to achieve. (Default is set at -1, which is full speed.)
Reset and Special
No Reset Zone
When applied to a node the player and the AI will be advanced to the next
valid node.
Pullback
When applied to a node, this option informs the AI to “pullback”.
Elevated
Apply to set the elevation of a node.
Disable ALOD
When applied to a node this disables automatic level of difficulty for that
segment.
No Track Offset
When applied to a node, the AI will adhere directly to the center line of the
track.
Clutch
When applied to a node the AI will use the clutch where specified.
Preload
When applied to a node the AI will preload where specified. (The AI will
preload 10% every mile per hour underneath the target speed).
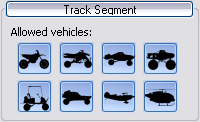
Allowed vehicles: As stated.
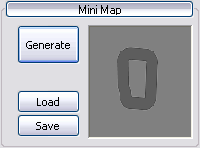
When you have finished laying down your track, press the “Generate” button to
automatically create a mini map for you. The mini map may be exported to an
image file and later reloaded with your custom modifications. To do this, save
the mini map as an image file with the “Save” button, modify the image with your
favorite image editing program, and then reload the image with the “Load”
button.
3
Shortcuts
Keyboard/Mouse Modifier Keys and Shortcuts
Every action in the editor has a fast path. Keep these within reach
while you build.
Keyboard
Action
Shortcut
New Map
Ctrl+N
Open Map
Ctrl+O
Save Current Map
Ctrl+S
Undo
Ctrl+Z
Redo
Ctrl+Shift+Z
Select All
Ctrl+A
Delete Currently Selected Object or Track Segment
Delete
Tilt Camera Forwards
Home
Tilt Camera Backwards
End
Mouse & Camera
Input
Behavior
Left Mouse Button
Execute currently active action
Middle Mouse Button
Hold to pan and tilt the camera
Right Mouse Button
Hold to move the camera along the x and y axes
Mouse Wheel
The mouse wheel controls zooming in and out
Lock Tool Axis
Hold shift while moving mouse on the axis you want to lock
4
Advanced
Advanced Techniques
Nat Track Creation Made Simple
When creating a Nat track start by designating the "lay of land" by painting
mountains and valleys to define the overall elevation of your environment. If your
mountains aren't high enough or your valleys aren't deep enough, simply slide the
"Elevation scale" higher. See examples on the following page.
Painting Made Simple
To make a quick and effective texture for your track start by using a medium
shade texture across the whole track. Then paint a darker texture for your track
path and follow it up by painting a lighter texture across the jump tips and
elevated areas. This is a simple way to get great looking textures fast.
Adding Roughness to Your Track Path
To add slight roughness to your track path to give your track a more natural look
and feel, use one of the more abstract brushes, set to a size the width of your
track path and strength set around 5. Now paint along your track path to add
slight random bumps. This can also work on the off track to make more natural
terrain.
Smoothing Jump Sides
To smooth out the hard edges of the jump sides when using preset jump shapes, use
the smooth tool with a soft round brush set to a size around 15 and strength
around 50. Work the sides of the jumps until they blend smoothly into the base
terrain.
Create Your Own Brushes
If the standard brushes are not enough for you, create your own! Simply create a
128x128.png in your favorite paint program and drop it
in your \media\brush folder. It will appear with your brushes the
next time you restart the editor.
Create Your Own Shapes
Add personality to your track by creating your own track pieces. Simply create
your section in your favorite paint program and save it as a . png file. Drop it
in your \media\shapes folder and it will appear the next time you
restart the editor.
Spraying Brush Shapes
If you prefer to "spray" your shapes into the terrain rather than "stamp" them
in, simply copy the . png files from your media/shapes folder to your media/brush
folder. Then you can select your favorite shape and gently lift it out of the
terrain.
Finalizing an Outdoor (Nationals)
Track
Once you’ve finished editing the inner terrain and the perimeter terrain, there’s
a good chance that the edges might not lineup up correctly, this can cause gaps
between the pieces called “seams”. To remove the seams you’ll need to use the
“Stitch Regions” tool in the general settings sidebar. Choose a height appropriate
for the terrains that you are joining and press the Go button. This tool does not
create a smooth gradient between the two sections, so you may need to edit the
terrain a bit more and apply the stitch tool multiple times.
Track Examples
We have included some example displacements and textures for use in the Unleashed
Editor. There are six examples which include: 2 SX tracks, 2 Freestyles and 2
Nationals. They are located in Data/UserTracks folder. Please feel free to use
these as examples on how to create your displacements and textures. When you
import these sample tracks, you will need to use the following settings: