Armadillo: The MCM2 Track Editor
Welcome to Armadillo, the Track Editor created by the designers and developers of Motocross Madness 2 for building and sharing unique racing worlds.
The editor combines a 3D modeling tool with a 2D painting tool. This restored web edition documents its controls and walks through creating a track.
Contents
- Track Editor Toolbar Controls and Buttons
- Camera Controls
- Keyboard Commands
- File, Edit, and Options tabs
- Components of a track
- Definitions of track types
- Creating a simple track
- Fine tuning your track
- How to place objects
- Importing components into the Track Editor
- How to import a terrain
- Saving your track
- Running the track in the game
Track Editor Toolbar Controls and Buttons
The following buttons are available on the toolbar at the top of the main Track Editor screen:
 Open saved
track
Open saved
track Save current
track
Save current
track Undo
Undo Redo
Redo Delete objects
 Move
objects
Move
objects Rotate
objects
Rotate
objects X, Y, and Z
constraints
X, Y, and Z
constraints Test computer
bike
Test computer
bike Rider
test
Rider
testOpen saved track: Click this button to open a track you have previously saved
.
Save current track: The first time you click this button, the Save As dialog is displayed, and you can specify the location where you want to save the current track. Once you’ve specified a location, clicking this button will automatically save your current track to that location.
Undo: Undoes most recent action or command
Redo: Repeats most recent action or commandDelete: Delete selected object(s).
Move: Move selected object(s). To cancel object placement mode, press the right mouse button or ESC.
Rotate: Rotate selected object(s): Moves the selected object(s) around its local axis (+Control: rotates object around world axis)
X, Y, Z axis: constrain the selected object(s) to movement along the X, Y or Z axis.
Test Computer Bike: Presents an AI bike and rider to test the track without actually importing track into game. The AI rider will attempt to follow the red center spline that is drawn during the path editing process. Use this button to drop in an AI bike and see how they navigate the track. Move the red spline (on the
Edit: Path tab
) to optimize AI performance.
Rider Test: Drops a bike and rider into the current track environment so that you can test-drive the track before you actually import it into Motocross Madness 2.
Camera Controls
Because the Track Editor is a mixture of a 3D modeling package and a 2D paint package, the camera controls need a little explanation. In a traditional 2D paint package, camera controls allow you to zoom and pan – that is, they allow you to enlarge or reduce the visible area of the drawing surface, or move the viewable window over the surface. In a 3D modeling package, however, cameras are necessarily more complex as there is now a new degree of freedom--you can now move INTO the world.
The camera control descriptions below are based on how they behave in each mode. The Track Editor is designed to intelligently adapt the viewing controls to the dimensionality of the space you are working in. In other words, the controls should work the way you would expect in both 2D and 3D.
To cancel any of the camera views, press the right mouse button or ESC.
 Mouse view
camera
Mouse view
camera Zoom
Zoom
 Region
zoom
Region
zoom Pan
view
Pan
view Anchor
camera
Anchor
camera Zoom
selected
Zoom
selected Perspective
toggle
Perspective
toggleMouse view camera: Creates a first-person view camera. The camera “looks” in the direction of the mouse movement and the cursor disappears. This camera is very similar to the types of cameras used in first-person “shooters” where keyboard controls move the camera and moving the mouse changes the look direction of the camera.
Zoom: Zooms in or out of the center of the track, magnifying the center of the view without “moving” the camera.
Zoom is different than a dolly in that a zoom simply magnifies the picture, while a dolly actually moves the camera in for a closer look.
Region Zoom: Creates an area in which to zoom. This command is actually a dolly, where the entire camera moves in, although it behaves like a zoom.
You can also drag an outline of a new window by holding down the left mouse button. This window will be enlarged when you release the left mouse button.
Pan View: Controls the camera in the same way as using keys W, A, S and D. (See
Keyboard Commands
for more information)
Anchor camera: Another dolly, this command allows the camera to “fly” around the selected object or the center of the selected object (anchor point). If no object is selected, the center of the world will be the anchor point.
Zoom selected: Creates view where all selected objects are visible.
Perspective toggle: Change between 2D (top down) and 3D view (In Paint mode: zooms out only)
Keyboard Commands
As in first-person “shooter” games, the cameras in the Track Editor follow the W, A, S, D control pattern, but camera controls also include a few modifications, including using Q and E to bring the camera up and down in 3D views and to zoom in and out in 2D views. In all modes, pressing the right mouse button or ESC will cancel the current mode and return you to the default mode.
Camera Keyboard Controls
| Switch to 2D (Top Down) view | 2 |
| Switch to 3D view | 3 |
| In 3D mode: | |
| Move camera up | Q |
| Move camera down | E |
| In 2D mode: | |
| Zoom camera out | Q |
| Zoom camera in | E |
| In both modes: | |
| Move camera forward | W |
| Move camera back | S |
| Pan camera to the left | A |
| Pan camera to the right | Spacebar |
| Accelerate camera movement | SHIFT + camera control |
| Move camera up and down | Left mouse button + y mouse axis |
Path Mode
| Move node | Click and then drag the node to the new location |
| Resize node | Press SHIFT and then drag the node |
Object Placement Mode
Click - Select object CTRL + Click - Selects/Deselects multiple objects SHIFT + Drag - Move object(s) along the terrain. (Default: moves along plane) CTRL + Drag - Move object(s) around common (world) axis. (Default: rotate around local axis) (+) + Drag - Move object up vertical axis (-) + Drag - Move object down vertical axis SHIFT + (+) or (-) - Move object four times faster
ESC - Cancels mode, returns to default
File, Edit, and Options tabs
To streamline the track-building process, the logical steps you need to take to successfully build a track have been broken out into three separate tabs, File, Edit, and Options, which appear on the right side of the main Track Editor screen.
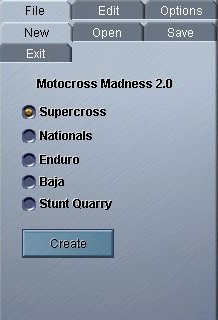
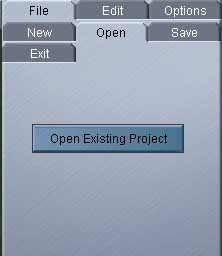
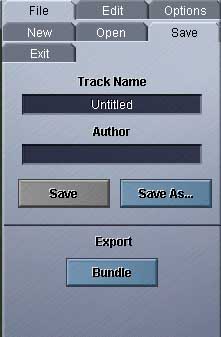
When you click the File Tab, the New, Open, Save and Exit Tabs become available. These tabs all control the handling of the track in the directory, from starting to build a new track to bundling a finished track and exporting it into the game.
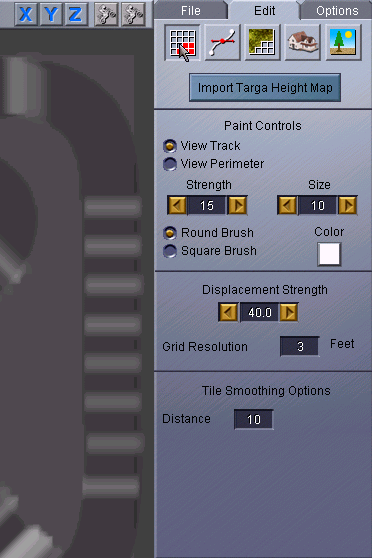
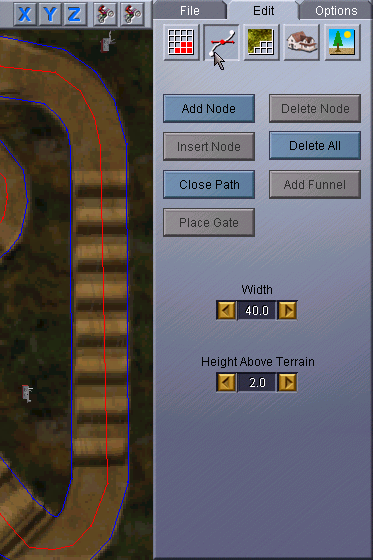
The Edit tab includes all of the options that allow you to alter the track physically. When you click the Edit tab, the Land, Path, Material, Object, and Enviro buttons become available at the top of the control panel.
Options tab
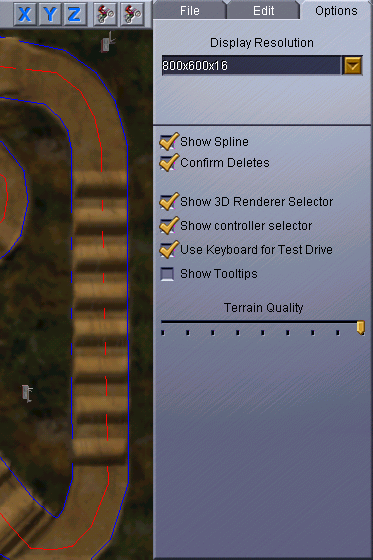
The Options tab includes controls for setting the display resolution and terrain quality, as well as controls that specify whether items such as splines and tooltips are displayed.
Components of a track
A track consists of several components that must be defined, created, and finally bound together to create a usable world in which to race. Not all of the components exist in all the tracks (waypoints do not exist in Supercross or National tracks, for example), but all of these pieces at one point or another exist in the process of building a track. Here, we break down and define the components according to where they can be found in the Track Editor.
 Edit: Land tab
The controls on this tab allow you to paint the terrain on which your track will be laid. (See How to Paint the Terrain for more information.)
Under Paint Controls: View Track and View Perimeter buttons allow you to switch between painting the terrain on the track or around its perimeter. The Strength and Size spin controls allow you to adjust the size and strength of the paintbrush stroke, which affects how bright and large the brushstroke appears. The Round Brush and Square Brush buttons allow you to switch between the two; the round brush is better for detailed painting, while the square brush is best for painting large areas. The Color button allows you to switch between painting in white or black. Just click the box to change colors.
Under Displacement Strength: The Displacement Strength spin control allows you to specify the maximum height possible for terrain in your environment. Setting Displacement Strength to 30, for example, would mean that any terrain painted completely white would be 30 feet high. The Grid Resolution control specifies the size of the grid when viewed from the top. Increasing grid resolution can smooth out the terrain and reduce blockiness. Important note: you must set your grid resolution before setting splines or adding objects. Once you’ve added a spline or an object, you cannot change the gird resolution setting.
Under Tile Smoothing: The Distance control regulates the area where the tiles match up
 Edit: Path tab
The controls on this tab allow you to create a path for your riders to race on. Below are some terms used on this tab:
Segments: Lengths of track, they create the main base of the path. Nodes: The “joints” of the track, they connect the segments. Spline: A collection of segments and nodes. Waypoints: The alternative to splines, these are in Enduro and Baja races. Instead of a strict path to follow, waypoints are tall gates that must be passed through from first to last in the fastest time. Start/End Gates: Where the race begins and ends. Funnel: After the Start Gate, the location where the track narrows noticeably leading to the main path of the track.
You can use the Add Node, Insert Node, Delete Node and Delete All buttons to add and remove splines from your track. When you’re finished laying down splines, click the Close Path button to complete the path’s shape.
To automatically create a start gate, an end gate, and a funnel, click the Add Funnel button and then click on a node. If you want to create a track without a funnel, click the Place Gate button to add a start gate and an end gate. The Width spin control specifies the width of the spline you are creating; make sure you specify the new width before placing the spline.
For more details on using these controls, see
How to create a path
.
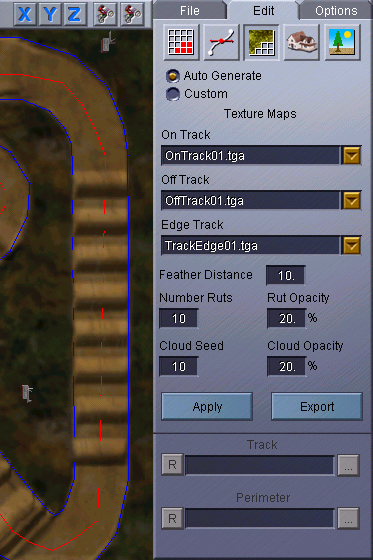
 Edit: Material tab
The controls on this tab allow you to apply and tweak textures in your track.
Some terms used on this tab: On Track: The main area of the track, the path where the riders race. Off Track: The area surrounding the path, the on-track area. Edge Track: The border between On Track and Off Track. (In Supercross and National events, all three track textures are used. In Enduros, Bajas and Stunt Quarries, only the Off Track texture is used.)
To auto-generate textures for your track, click the Auto-Generate button and then choose a texture from the On Track, Off Track, and Edge Track dropdown lists.
The Feather Distance control specifies how much each track texture overlaps onto the next.
You can use the Number Ruts and Rut Opacity controls to create tire tracks that appear on the ground. Experiment with the settings until you get it just the way you like it.
You can use the Cloud Seed and Cloud Opacity controls to create shadows produced by the clouds in the sky. Both of these elements refine the details that appear in the ground texture. The Cloud Opacity setting refers to how thick the shadows or treads appear, where 0% equals completely transparent and 100% equals completely opaque.
For details on using the other controls on this tab to apply custom texture maps to your track, see
How to import textures
.
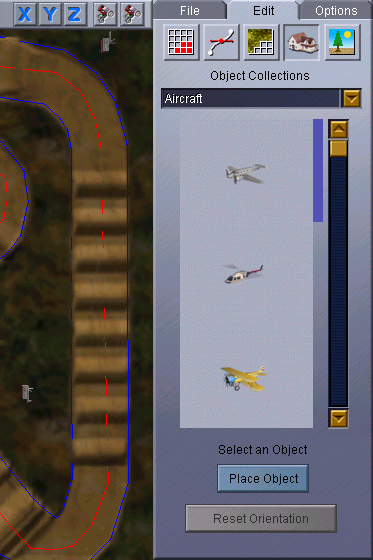
 Edit: Object tab
The controls on this tab allow you to add objects to your track environment.
Once you’ve selected an object from the Object Collections, click the Place Object button, and then click on the track where you want to place the object. For details on moving and adjusting the placement of an object, see
Moving an object
.
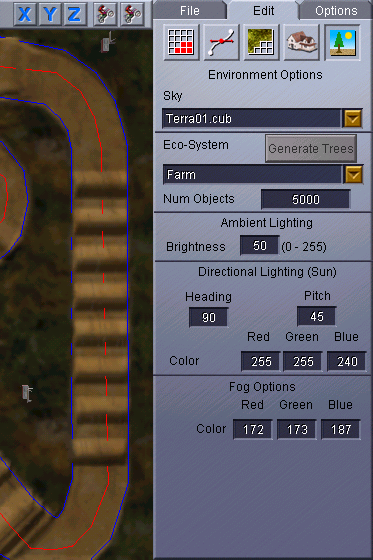
 Edit: Enviro tab
The controls on this tab allow you to specify sky and lighting effects, and eco-systems for your track. For details on using these options, see
Fine tuning the environment
.
Definitions of track types
You can build five different track types with the Track Editor, Supercross, Nationals, Enduro, Baja, and Stunt Quarry. (Note: While Stunt Quarry is not technically a “track”--there is no path, only terrain, objects and eco-system, after all--it is considered a track style that can be built and integrated into the game.)
While all the tracks share some elements, they are all also very different and possess their own characteristics. With the exception of the stadium in Supercross, there are no limitations to what you can place in your world.
Supercross: Supercross tracks are always located in a stadium. Riders follow a specified track (created using splines and nodes) that runs from a start gate to an end gate.
Supercross tracks are set on a 3x3 grid, with the track tile being the unique center tile. The perimeter tiles are all copies of themselves, but you can alter the terrain and define the textures. IMPORTANT: When you create a Supercross track, you must place a stadium. Your track will not bundle without a stadium.
Nationals: Nationals tracks are similar to Supercross track, except that Nationals tracks are set in the great outdoors. Nationals are set on a 5x5 grid, with the track tile being the unique center tile. Unlike the Supercross world, Nationals have another set of tiles that surround the perimeter. These tiles, called edge tiles, cannot be changed, and provide a boundary to the world.
Enduros: On Enduro tracks, riders follow an unspecified path as they cross through waypoints (tall gates) in wide open environments populated with lots of moving objects.
Bajas: Baja tracks are very similar to Enduros, except that Bajas are generally much more sparsely populated with objects.
Stunt Quarry: No track and no waypoints. All you have to do is kick off awesome stunts to garner the most points in a set amount of time.
Enduros, Bajas and Stunt Quarries are all set on 6x6 grids, where the track is set on a 2x2 square in the center. Like the Nationals, these worlds contain both perimeter tiles and edge tiles. Again, the track tiles and the perimeter tiles can be altered, but the edge tiles cannot. In Track Editor, the 2x2 center track tiles appear as one tile and are treated as such.
IMPORTANT:The only other difference in creating these five types of tracks is in how the path is laid. Terrain, objects, and environment are all created in the same way, regardless of the kind of track you are creating.
Creating a simple track
In this section, we walk you through the process of creating a simple track.
When you create a simple track, you work with all the Edit tools needed to create a track: Edit: Land tab, Edit: Path tab, Edit: Material tab, Edit: Object tab, and Edit: Enviro tab.
A Nationals track is the logical place to start because it is the easiest type of track to create that includes all of the basic elements necessary for a complete world. (The more complex worlds take the basic components and simply expand upon them--i.e., importing textures to create more intricate terrain).
While we do explain how to create more complex worlds, we encourage you to start simple and play with the Track Editor. Discover what each of the tools can be used for, experiment with strengths and colors, play with terrain and objects to create a track entirely your own.
Notes on starting a new track
- When you start the Track Editor, the File: New tab is displayed. Choose the type of track you would like to build, then click Create to begin building the terrain.
- If you would like to start over at any point while editing a track, return to this screen and start again.
- When you start the Track Editor, you must first select a track style or a previously saved track to work on.
- If you have a previously saved track upon which you would like to work, use the File: Open tab.
How to paint the terrain
Once you’ve chosen the type of track you want to build, your next step is to paint the terrain upon which your track will be laid. The controls used to paint terrain are on the Edit: Land tab.
Important: The painting used in the Track Editor is grayscale—black, white, and everything in between—and it determines the terrain elevation. Whiter terrain is higher; blacker terrain is lower. By layering displacement maps, you can adjust the overall elevation. See How to import a terrain.
The painting tool in Track Editor works the way it does in most paint programs. The main tool is the paintbrush, which functions in an airbrush mode. There are two styles of paintbrushes to select from, a round brush, which is tapered, and a square brush, which is not. The round brush is better for detailed painting, while the square brush is more suited for painting larger areas. The longer you hold down the button on a stroke, the more paint appears.
On the Edit: Land tab, you can adjust the size and strength of the paintbrush, which affects how bright and how large the brush stroke appears.
You can also select either black or white paint for your paintbrush. And, depending on the other adjustments you have made, you can adjust how brightly the paint appears. By playing with these options, you can create complex terrain of varying heights and levels.
You can also adjust the maximum height of the terrain, which can be created by painting the terrain pure white. By clicking the spinners or typing in a number, you can adjust the maximum height of the land.
Another option you can use is to determine the flatten distance, which regulates the area that the tiles match up.
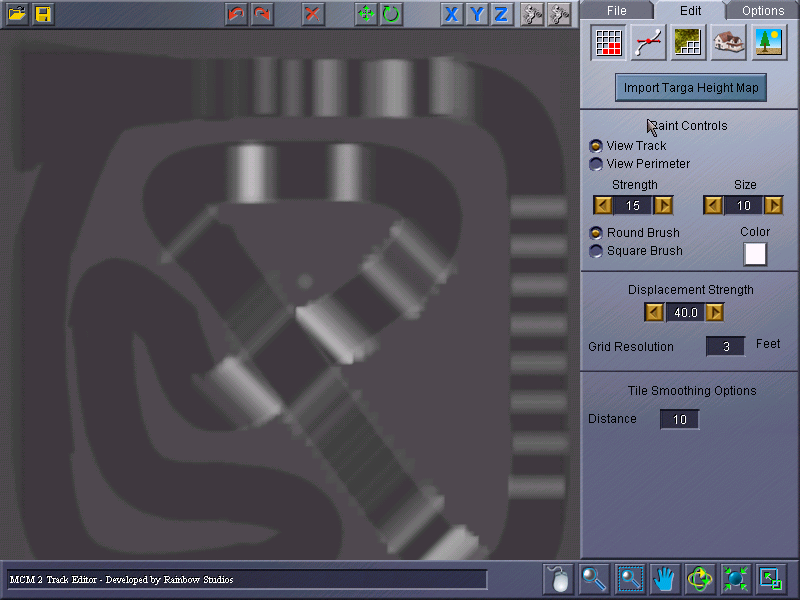
A painted terrain.
Tips on painting the terrain
- Toggle between the Track and Perimeter tiles with the appropriate button.
- To render the height map in 3D, choose Edit: Path, Edit: Material, Edit: Object, or Edit: Enviro.
- All keyboard camera controls remain available while painting terrain.
How to create a path
Once you’ve painted your terrain and created elevation changes, your next step is to create the path the riders will race on. The path controls are on the Edit: Path tab.
For Supercross/Nationals events
Supercross and National events take place on a determined path. All racers must follow the same path from beginning to end, and whoever completes the race with the fastest time wins.
To build the path, you first lay down splines by clicking on the Add Node button, and then clicking on a start point and an end point for the spline. Continue to click a path of splines around the terrain to complete the circuit.
You can adjust the spline width using the Width option, but you need to specify the new width before laying down the spline. The width of each spline is independent of the others, so they can be adjusted to different widths as you go along.
You can also adjust the spline by clicking and dragging individual nodes. Nodes are placed in sets of three, and when one node of a set is selected by clicking on it all nodes in the set will become highlighted. If you hold down the CTRL key while dragging a node, all nodes in the set will be dragged along with the original node and they will stay proportional to each other. If you hold down the SHIFT key while a node is selected, and you move the mouse, the outside nodes will move away from the inside node proportionally.
Holding down SHIFT while dragging the selected node will make it wider. You can hide the splines from the Options tab by deselecting Show Spline.
The red and blue lines on the track are the first spline.
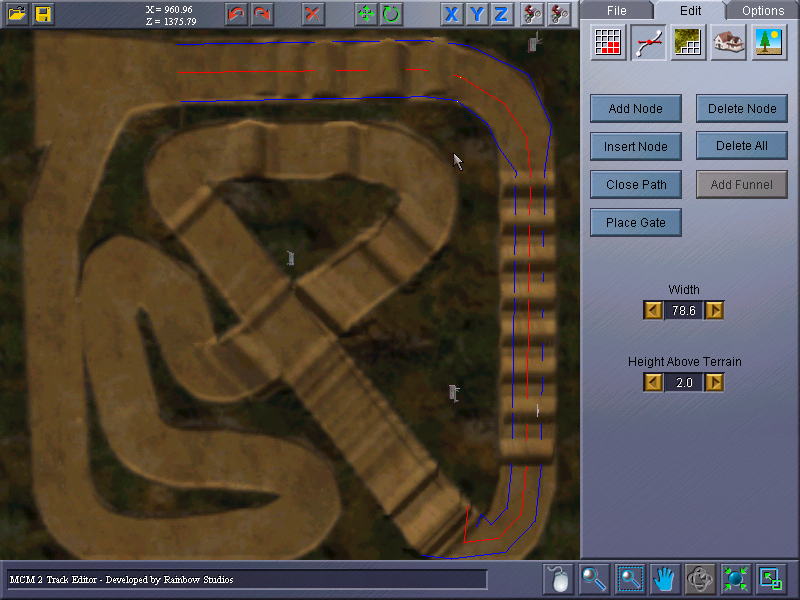
When you’re finished laying down the splines, click the right mouse button to exit the Add Node mode. Click the Close Path button to automatically complete the path’s shape.
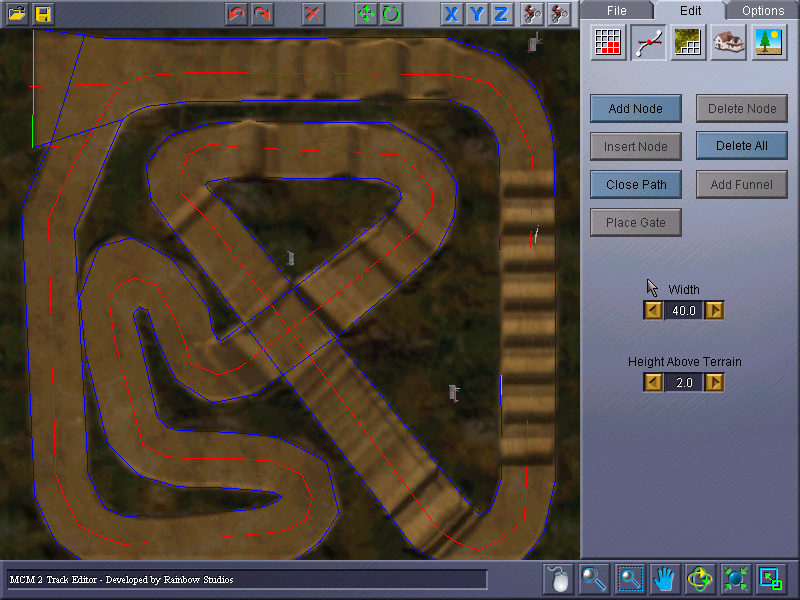
A finished path is shown below.
Adding a funnel, start gate, and end gate
To automatically create a start gate, end gate and funnel for your track, click the Add Funnel button and then click on a node.
If you choose not to have a funnel on your track, select a node and click the Place Gate button, which will place a start gate and an end gate on your track.
You can always select a new start/end gate by clicking a new node and reselecting the Place Gate option. The track will not bundle (be saved to be imported into the game) without a Start Gate and an End Gate. The Test Computer Rider button will not work without a Start Gate and an End Gate. The red center spline is used to help guide the AI racers. You may want to adjust this spline to optimize AI performance.
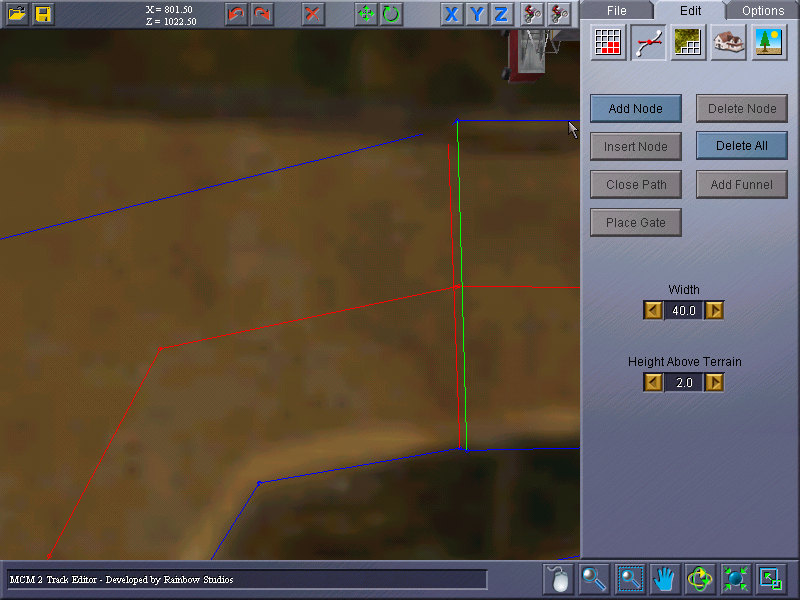
The Place Gate function places the start and end gates one foot apart.
For the Enduro/Baja events
Enduro and Baja events take place in much larger worlds, without a set course or path. Instead, the riders must race from waypoint to waypoint, finishing the course in the fastest time possible.
Important Note: While the path between waypoints is not specified in Enduro and Baja events, the order that riders must pass through waypoints is. The order the waypoints must be passed through is determined by the order in which they are placed upon the terrain.
Waypoints are relatively easy to place. All you need to do is select the style of waypoint you would like from the menu provided, click the Place Waypoint button, and begin clicking on the terrain where you would like the waypoints to be placed.
Each new waypoint automatically faces the previously placed waypoint. You can move and rotate it like any other object; see How to place objects. If you’re not satisfied with the way you have placed the waypoints, you can click the New Race button, which clears the waypoints from the terrain and leaves you with a pristine canvas. If you do not like the way one particular waypoint is positioned, it can be deleted like any other object (see How to place objects).
You can also save different waypoint races for the same terrain. Because waypoint races are imprecise in terms of path structure (it doesn’t matter how you get from waypoint to waypoint, just as long as you do it in order), having multiple races for the same terrain offers variety and challenge.
Using the Save Race button, you can store the waypoint race for future reference. Using the Load Race button, you can open a previously saved race and use it on the current track.
Changing the appearance of the terrain
Changing the appearance of the terrain can mean the difference between creating a winter track or a summer one. And, as you get more adventuresome, you can use almost any texture as a custom terrain texture, as long as the file is saved using the .tga file name extension.
The different track textures (On, Off and Edge) help to differentiate the track for the riders on Supercross and Nationals tracks. Where there is no path (Enduro, Baja and Stunt Quarry), only the off-track texture is used.
To apply textures to the terrain in your track and tweak them ,follow the steps below:
- On the Edit: Material tab, click Autogenerate and choose the On Track, Off Track, and Edge Track texture maps.
- Set the Feather Distance to control how much each texture runs into the next.
- Specify Number of Ruts and Rut Opacity to create tire tracks in the ground.
- Specify Cloud Seed and Cloud Opacity to create cloud-shadow patterns.
- Click Apply to view the changes.
Fine tuning your track
What makes each custom track so unique can be found in the details. The kind of texture you use on the terrain can determine the region the track exists in, and the terrain itself can determine the difficulty of the track, but the objects and the environment make the track truly an individual and unique world.
How to place objects
Objects can be defined as those parts of the track that are not a part of the terrain. While an eco-system is not an object, the trees and shrubs that can be individually placed are objects. When you place objects, you are creating variety and obstruction in the terrain. The trailers, hangers, ruins, people and cars are all a part of the terrain only in that they are objects placed there.
Placing an object is as easy as placing a waypoint, only it doesn’t require any kind of the thoughtful planning or technique that a waypoint race requires.
How the
Edit: Object tab
appears when first opened.
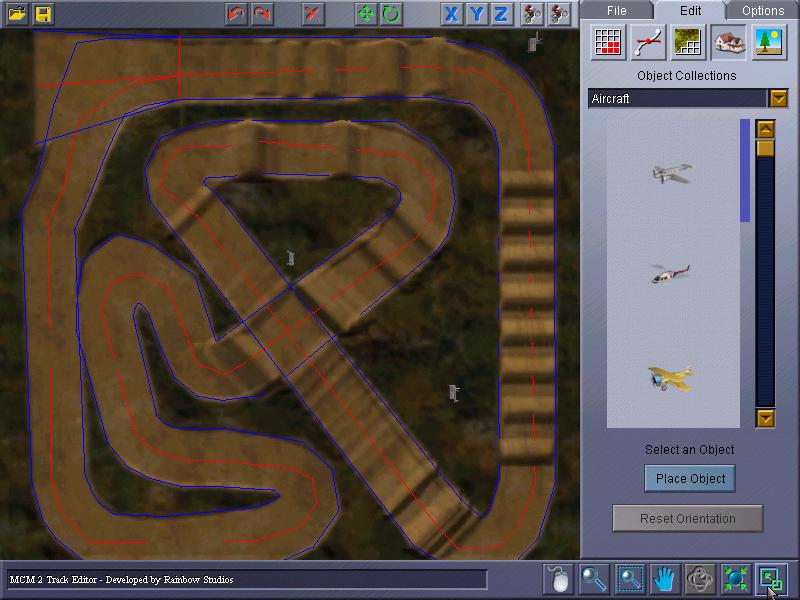
To place an object, on the
Edit: Object tab
, click the object you want to place on your track. Click the Place Object button, and then click where you want the object on the track.
IMPORTANT: If you are creating a Supercross track, you must add a stadium object to your track (on the Edit: Objects tab in the Stadiums folder). Otherwise, you will not be able to bundle the track or export it for use in the game.
Moving an object
The biggest challenge to moving or adjusting an object’s position is trying to make sure its placed just so, and exactly the way you want it.
To move and adjust the position of an object, follow the steps below: First, select the object using the left mouse button. Then, drag the object to its new location. You can move an object as many times as you please, and to just about anywhere you please (just make sure the Y axis is selected). To select multiple objects at once, hold down the CTRL key while clicking the objects with the left mouse button. To elevate the selected object(s) vertically, hold the + (plus) key. To lower the selected object(s) vertically, hold the – (minus) key. By default, the object(s) will glide along the terrain. If you want the object(s) to move horizontally, regardless of terrain, hold down the SHIFT key while selecting the object(s).
Rotating an object
To rotate an object to face in a different direction, select the object by clicking on it with the left mouse button, and then drag the mouse in the direction you want the object to move. Keep in mind that the object will only rotate around the axis that is selected at the moment, but the axis can be changed at any time, so play with the X, Y and Z axes to discover which direction you prefer.
Tips on placing objects
The axis is the center of that particular unit, whether it is the world or the object. When an object is selected, a box will outline the object. To deselect the object, click anywhere outside of the object. To deselect one object from a group, press the CTRL key while clicking on the object. To delete an object, right-click out of Placement mode, and select the object by clicking on it with the Left Mouse button, then click the Delete button.
Fine tuning the environment
For the purposes of the Track Editor, the environment of a track consists of the following:
The sky
The various lightings
The eco-system (which you will not be able to see in the Track Editor, but will be present when the track is loaded into the game)
You can specify your track environment on the
Edit: Enviro tab
.
The lighting is created by combining the colors Red, Green and Blue in varying degrees. Think of the colors like sheets of thin plastic. The higher the number, the thicker the sheet of plastic. All of the sheets exist independent of the other sheets, and their numbers can be adjusted ranging between 0 (zero) and 255.
Setting a color to 0 will essentially eliminate that color, while setting all three colors to 0 will make the light black. On the other hand, changing all three colors to 255 will result in a white light.
The lighting options may appear to have subtle differences, but they can make a huge impact on the feel of the game.
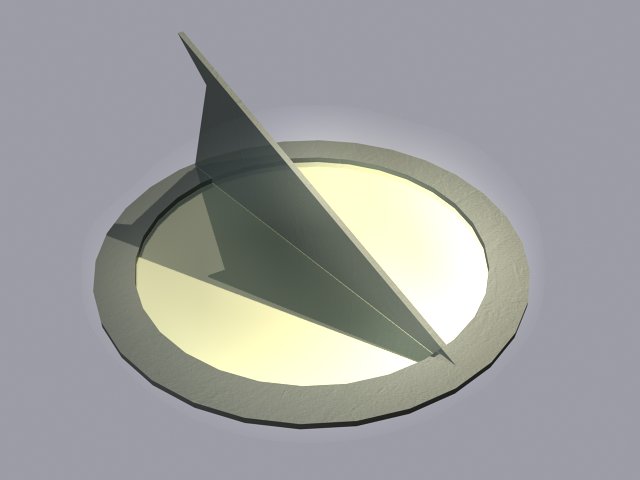
Ambient Lighting is like the light in a room, acting much like overhead lighting. Directional Lighting (also known as the Sun) originates from a specific spot in the sky. The position of this light is determined by its Heading and Pitch, which work much like a sundial. Heading is the face of the sundial (360 degrees), and Pitch is the needle (90 degrees). They can be adjusted separately. For instance, H=0 and P=15 places the sun north and low in the sky.
Fog is a cloudlike light that can affect visibility.
To see the lighting changes you have made reflected in the terrain, click the
Edit: Material tab
and then click the Apply button. The Track Editor will integrate the changes into the texture maps.
Here the Sky and Eco-System have been changed, but you can only see the changes to the sky. The eco-system will only appear in the game.
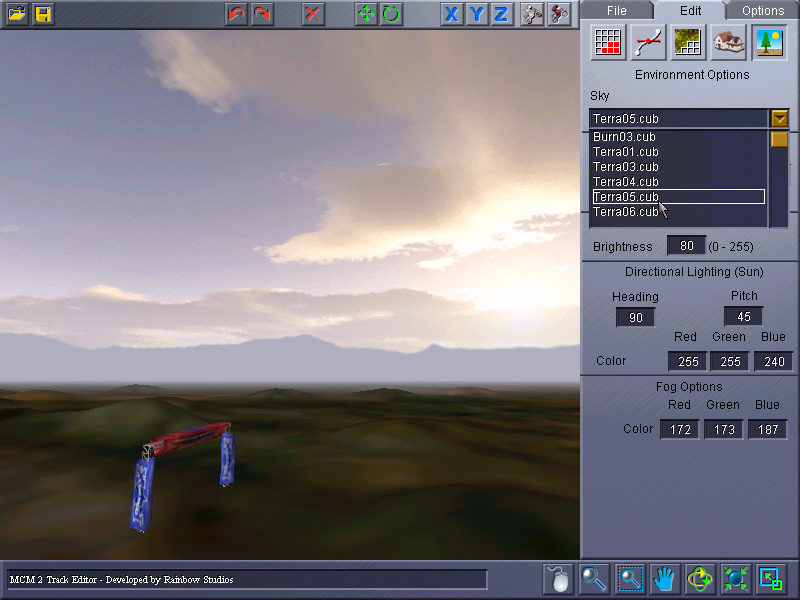
On the Edit:Enviro tab, you can select all the environmental attributes you feel would best suit your track, from the sky that catches your eye to the eco-system that best fits your terrain.
Sky can best be seen in the Track Editor from the 3D view, or from a mouse-look camera facing up. The number of objects (trees, bushes, and other) the eco-system will contain can range from 0-100,000, but optimal numbers range from 5,000-25,000. The number of objects in the eco-system can significantly effect the bundle time.
Importing components into the Track Editor
By using a painting program or by scanning in a picture, you can create your own terrains and textures to import into the Track Editor. By importing your own displacement map and textures, you can make the world truly your own.
Plus, the opportunity to fully build a world of your own imagination gives you the chance to flex that gray matter in your head, right? We won’t tell you how to create the displacement maps or texture maps (only because how you do that is your own choosing), but we will fill you in on how to import terrains and textures into the Track Editor.
How to import a terrain
Importing the terrain can be useful if you are not comfortable using the airbrush system used to create terrains in the Track Editor. Using a painting program or other tools, you can create the land upon which you will be laying your track.
And, there are other advantages; by layering displacement maps, you can adjust the height of the whole terrain to create new landscapes. Positive or negative values of white added to the white already placed equals the new height.
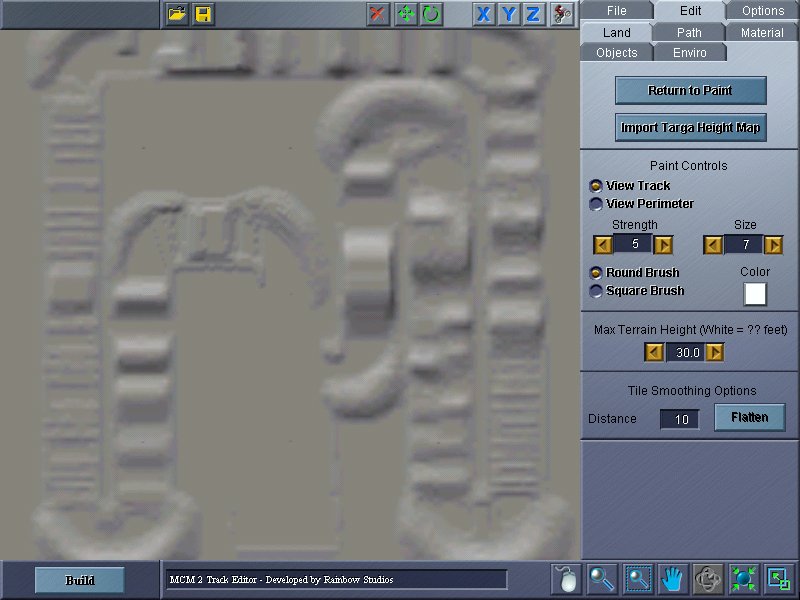
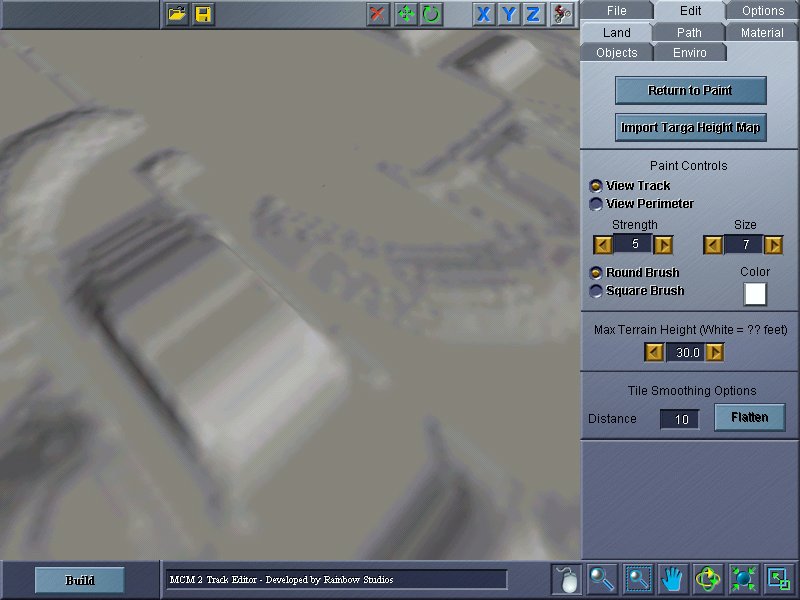
Here’s a single displacement map in three views.
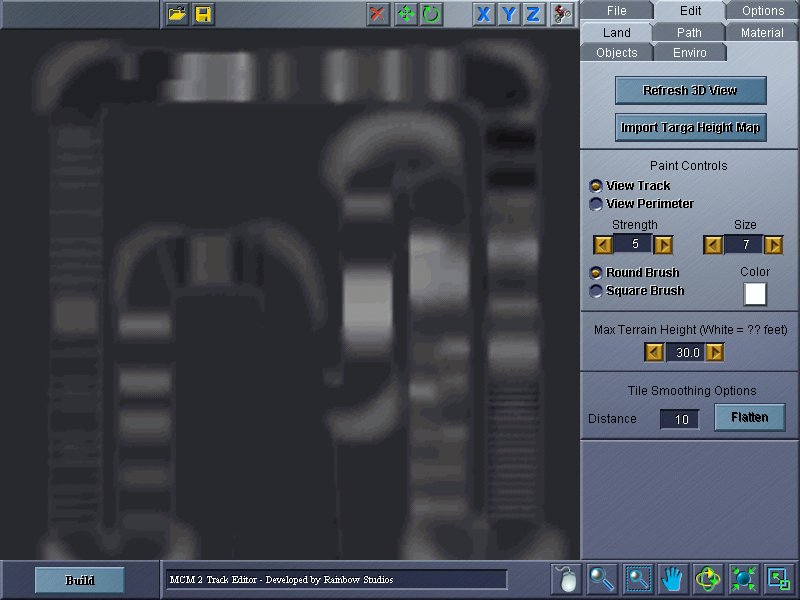
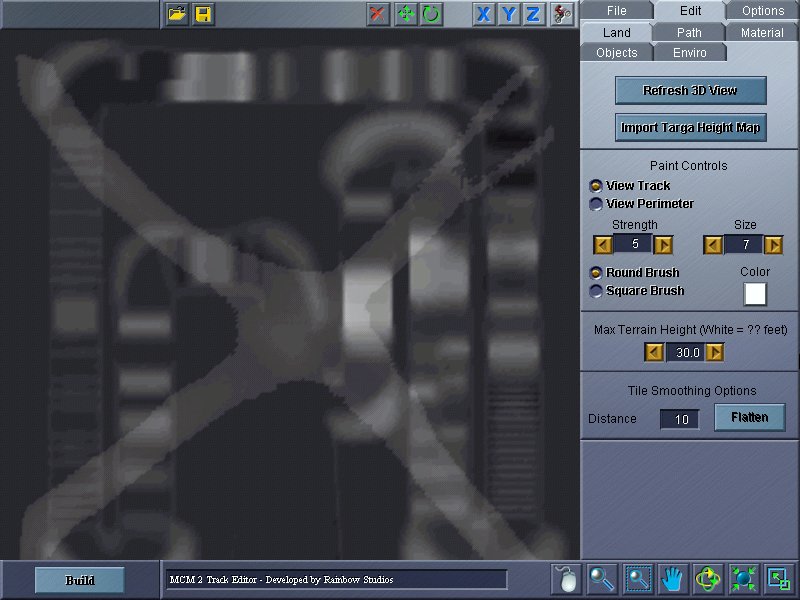
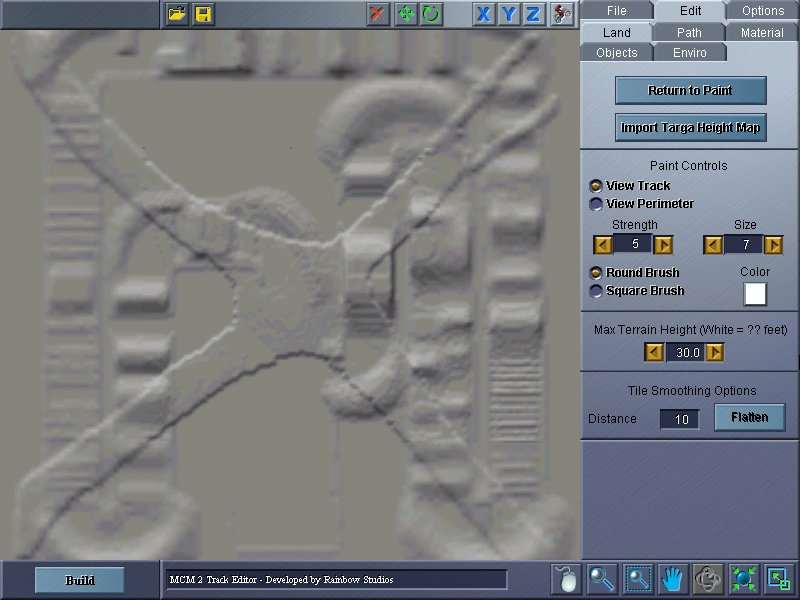
Here, the displacement map from above is layered with a second map.
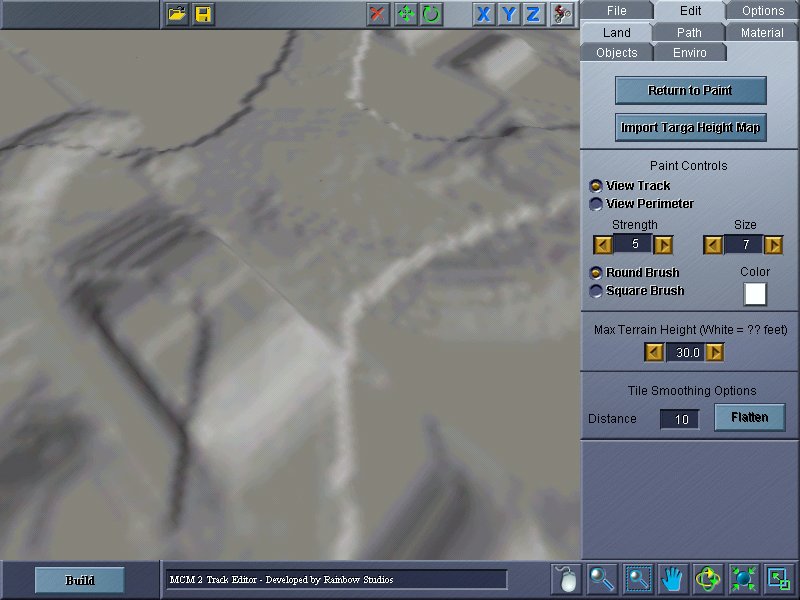
To import your own terrain, follow the steps below
On the Edit: Modify Terrain tab, click the Import Targa Height Map button. Specify where the targa height map should be placed: on the Track or on the Perimeter. If the displacement map is being placed as the lone map, select the Override Existing option. If the displacement map is being combined with another map, select the Composite option. Find the correct displacement map by searching the directories (more information can be found in Tips on Importing Components).
You must navigate the directories before you can find your treasure of an import. Once you’ve navigated to the directory where the targa file you want is located, click the Open button. Click the Import tab. This will take you back to the
Edit: Land tab
, where you will see the displacement map on the track (to see the 3D view of the displacement map, click on the Refresh 3D View button).
The imported displacement map unveiled.
You can place as many displacement maps as you want by repeating these steps. Remember: select Composite to layer the maps, or select Override Existing to delete the previous maps.
Layering the displacement maps on top of each other can provide unique and challenging terrain.
Tips on importing terrain
The requirements for importing displacement maps are 257x257 pixels for Supercross and National tracks, and 512x512 for Enduro, Baja and Stunt Quarry tracks. Only 24-bit Uncompressed Targas (extension: .tga) can be imported as displacement maps. If you are painting in Grayscale in a painting program (such as Photoshop), be sure to convert back to RGB before exporting out of your paint program. You can use the Reload button to reload your last track or perimeter displacement map
How to import textures
You can use two different methods to import textures for the terrain: the Track Editor can auto-generate the texture, or you can supply custom textures which you created outside the Track Editor.
To import the one texture for the whole terrain, click the Custom button and specify a track or perimeter texture using the “…” button (located on the right side of Track and Perimeter boxes).Click the “…” button to display the Import From dialog box. Click the “R” button to reload the texture.
To import a texture so it will be available on the dropdown lists of available texture maps that are displayed when the Auto-Generate button is selected, save the Targa (.tga) to the TextureMaps folder (in the TrackEditor folder in the location where you installed Motocross Madness 2). As long as the texture map follows the requirements listed below, it will appear on the dropdown list. These textures must be 480 pixels by 480 pixels.
Tips on importing textures
All textures must be created in 24 bit uncompressed Targa format. Single grid maps (Supercross, National, Stunt, as well as border tiles) require a texture that is 960X960 pixels in dimension. 2 X 2 grid maps (Enduro and Baja maps) require a texture that is 1920X1920 pixels in dimension.
Once you have created a texture you wish to use, go to the Edit: Materials tab, click the Custom radio button near the top and then click the '...' button to specify where the terrain texture you've created is located. Clicking the 'R' button to the left of the specified texture will reload the texture from the specified location.
How to import objects
If you would like to create your own objects to inhabit your world (because you don’t like the way we modeled a tree and think you can do better), there are a few rules you need to keep in mind:
Once you have created your object, you need to save the usermodel.slt file in the
UserModels folder (found in the Trackeditor folder in the location where you installed
Motocross Madness 2). The usermodel.tga files also need to be saved in
the UserModels directory. If you want a thumbnail of your object to be available on
the Objects tab, you’ll also need to save the usermodel_art.tga file in
UserModels folder also. It is important for you to remember to save the targa;
otherwise the preview won’t be available on preview/selection list box. Once you’ve
copied the files to the above locations, Track Editor will automatically detect the
new objects and make them available on the Edit: Objects tab. To add your objects to a
group or create a new object grouping, you need to edit the Groups.ini file.
The Track and Perimeter controls at the bottom of the Edit: Materials tab are also used to import custom textures for the track and perimeter grids. Here is how they work:
After you have auto-generated your terrain textures, you may want to tweak them using a 3rd party paint program, or you may want to generate your own texture map for your environments. To tweak an auto-generated terrain texture, use the 'Export' button to save the terrain texture to a designated directory. Make sure you use the TGA file name extension '.tga': the format used to save terrain textures is Targa uncompressed.
How to navigate the directory
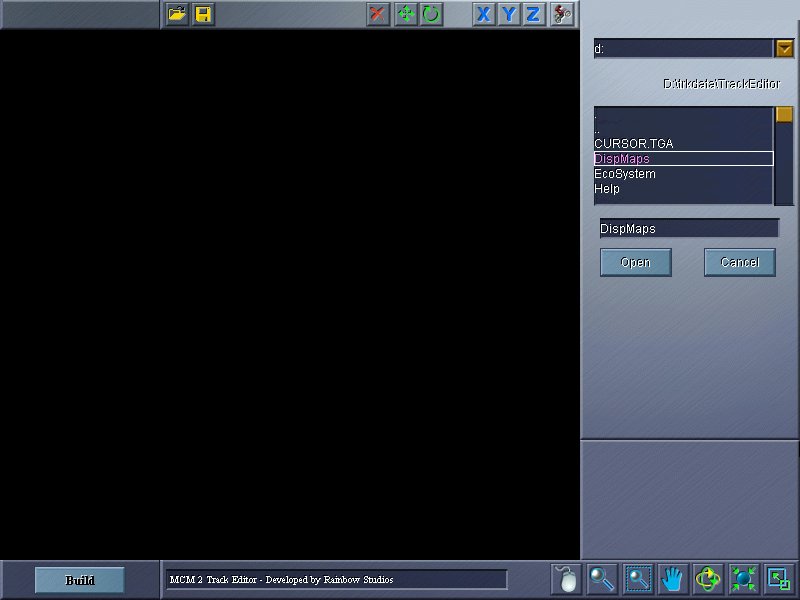
To move the directory up a level, double click on the two little dots that appear above the top line in the folder you are in. To refresh the directory, click on the single dot at the top of the window. To traverse the directory, use the pull down menu at the top of the tab to find the drive you want, then double click through the directories to arrive where you want to be.
Use the pull down menu to find the drive you want.
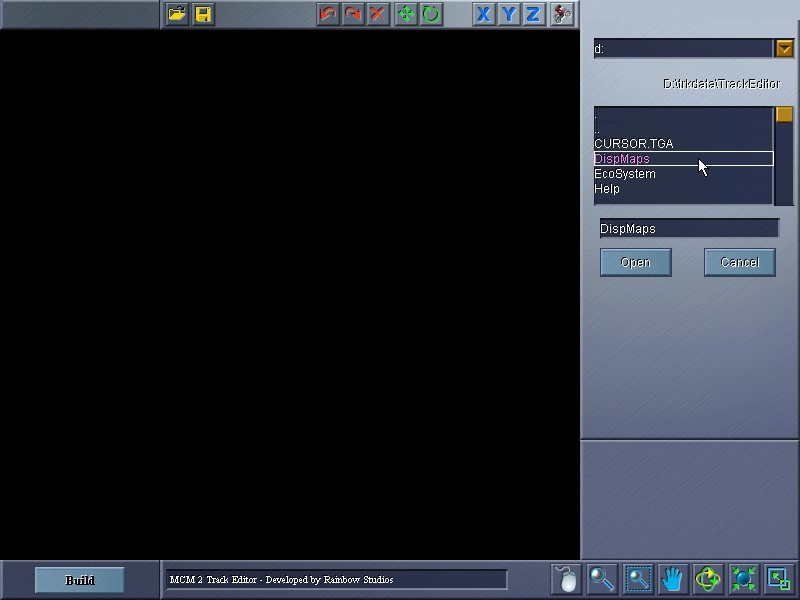
The single dot (.) at the top of the square refreshes the directory.
The two dots (..) above CURSOR.TGA move the directory up one level.
Saving your track
Keep in mind that saving your track is not the same thing as importing it into the game so that you can play it in Motocross Madness 2. If you are not finished creating your track, you can save it in-progress and return to it later.
The Save and Save As commands in the Track Editor work as they do in most other Windows program, where you create the file name, specify the directory, then the folder that the file will be saved in. To create a directory, type in the directory’s name, then click on the Create Dir button.
To save a track, click the Save Tab, and then enter a track name and author. Next, select a directory where you want to save your track (more information on this can be found in
How to navigate the directory
), and then click the Save button.
The first time you save the track, the Save As dialog box is displayed so that you can specify which directory the track will be saved in. When creating and saving many tracks, it’s a good idea to save each track (and its accompanying files) in its own folder.
The following files are created when you click the Save/Save As button:
Project.trn Terrain file Also contained in final bundle used by MCM2
Project.txt ecosystem working file
Project.est Ecosystem description file
Project.esb Binary ecosystem file. Contains placement data, vegetation descriptions etc. Also contained in final bundle used by MCM2
Project.prj Contains project information and settings
Project.scn Contains scene information (object placement, lighting info,
ect) in ini format Also contained in final bundle used by MCM2
Project.tdf or ProjectX.wpt Spline / track path file Also contained in final bundle used by MCM2
Project.ini Ini file used by the project bundler. Users may edit this file to include any files in which they need to be included with the final project bundle…the env file.
Running the track in the game
To run the track in the game, you must first save it and then bundle and export it. To bundle and export a track, click the Bundle button on the File: Save tab, and the Track Editor will export your track into the game for your enjoyment.
When bundling a track for inclusion in the game, the Track Editor creates several files that are required in order for the track to work in the game on your machine. DO NOT DELETE THESE FILES. If you do, your custom track won’t work in the game.
The following files are created when you click the Bundle button:
Project.env Final track editor output. Contains everything needed for MCM2 to load the user track. This file is encrypted.
Project.tga Large version of the thumbnail image displayed during track
selection in MCM2
ProjectS.tga Small version of the thumbnail image displayed during track
selection in MCM2
If you want to share your tracks with your friends, family, and the CIA, you can distribute your .env file (located in the teraform\track type directory). If you built a Supercross track, for example, you can find your .env file in the \teraform\SX directory. You only need to supply your friends with the .env file—no other files are required.