Making Texture Maps
The surface of your terrain is covered with an image known as a texture map. This image contains all the details that visibly define the surface of the track.
Texture Map Details
- The application you use to create the texture map is not important.
- A Nationals track requires 4 separate images
- A Stunt Quarry requires on 2 images
- All images must be a 24-bit targa files
- All images must be seamless tillable
The 4 images you need to create for a Nationals track are as follows:
1) The primary 1x1 terrain texture at an exact resolution of 1016 x 1016
2) A scaled copy of the primary texture at a resolution of 504 x 504. This image must be
the same filename as image 1, with an "A" appended to the end of the filename.
For example, if image 1 is named "MyTexture.tga", image 2 should be named
"MyTextureA.tga".
3) A small tiled image that is used around the perimeter of the track. The resolution of
this image should be 62x62
4) A scaled copy of the small tiled image at a resolution of 30 x 30. This image must be
the same filename as image 3, with an "A" appended to the end of the filename.
For example, if image 1 is named "PerimeterTexture.tga", image 4 should be
named
"PerimeterTextureA.tga".
Here is a sample set of images for you to study. These images are the four textures
that compose the Nationals track "Augusta Park". Keep in mind that these
images
are JPGs, so they've been compressed quite a bit.
| Image 1 - 1016x1016 | Image - 2 504x504 | Image - 3 62x62 | Image - 4 30x30 |
|
|
|
|
|
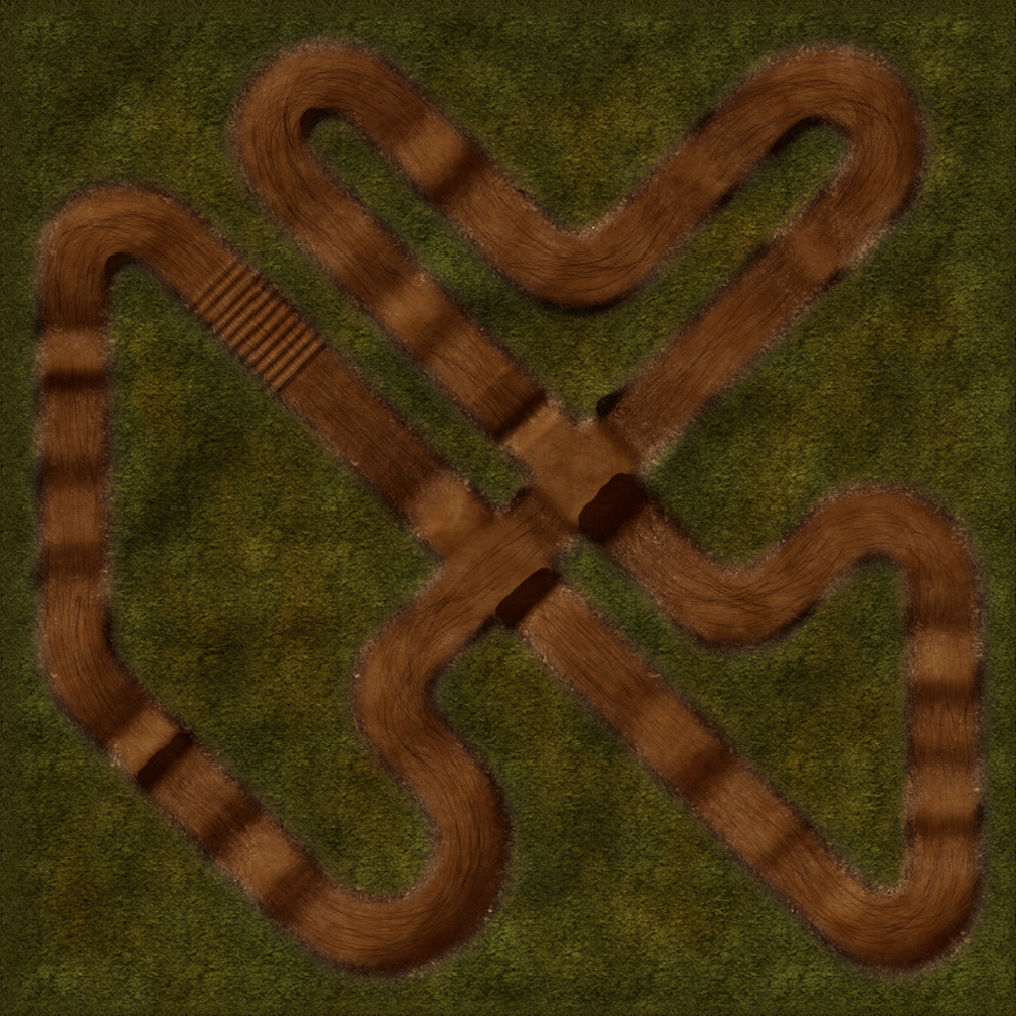
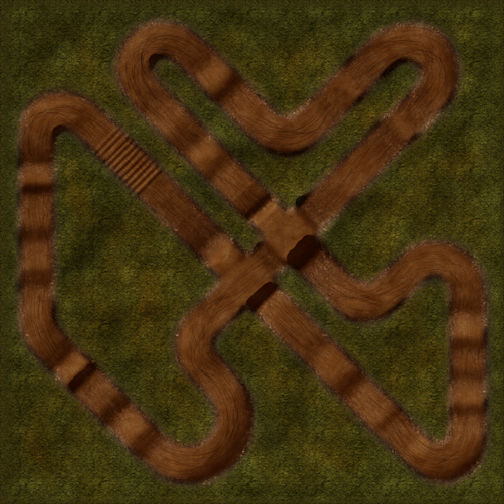


Just in case you're wondering...yes, images 1 & 2 are the same image, only image 2 is scaled to from 1016x1016 down to 504x504. And yes, images 3 & 4 are the same image, only image 4 is scaled down from 62x62 to 30x30.
Important: If you are making a Stunt Quarry you DO NOT have to create images 3 & 4, only image 1 & 2.
The reason why you have to pre-create duplicate images at different resolutions has to do with the way 3D hardware bi-linear filters images at run-time. When you have an image that is tillable, and you scale that image down, all the edge pixels need to be sampled against pixels at the opposite edge of the image in order to keep the image tillable after scaling. 3D hardware does not take this into account as it scales images during real-time rendering. By preparing the highest and second highest resolutions ahead of time, our processing tools (MakeTerr) can work around this hardware limitation and keep your images from having seems show up in the game.
Rendering Ray-traced Shadows in 3D Studio Max
If you choose to paint your texture map by hand, you will not be able to make the shadows in the game match up properly with the bike and rider shadow. It is not a 100% requirement that you take the time to do this, but we prefer that you do. A lot of development time and effort went into making the game support real-time raycast shadows that match the shadows within the environment perfectly. So we'd really appreciate it if you would respect that and take the time to set up the shadows in your terrain precisely.
If you created your displacement map in 3D Studio, then your ready to map your terrain, set up the lighting, and render out a nice high resolution texture map.
Once you've got your terrain mapped and your happy with basic look of it, you'll want to set up the lighting in Max in preparation to render the shadows that will match up with the in-game shadows. There a several limitations as to where you place the light in Max that relate to how well the shadow of the bike and rider will function in the game.
- The type of light you should use in Max is called a
"Target Spot Light". Do not use a parallel light.
- I suggest that you render your texture out in Max at about 2000x2000. This way you
can
go into Photoshop and do additional painting cleanup, like making it tillable, prior
to
scaling it down to 1016x1016.
- A nice effect you can add in Photoshop to give the look of the terrain more natural
variety is to add a new layer in the image, then use the Photoshop "Clouds"
filter to create a random clouds images. The composite the clouds image over top of
your
rendered image using one of the various compositing methods, like Lighten or Darken at
about 15-25% opacity. This will add a lot of variety to the way the texture appears in
the
game.
The simplest way to set up your lighting in Max is to choose from one of the preset light locations provided below:
Important: Don't forget that the x-y-z coordinates represented below have the Y and Z axis swapped between Max and D3D.
Use one of the following presets for Nationals style tracks (5x5's)
|
Nationals Presets |
3D Studio Coordinates |
Direct 3D Coordinates |
| #1 (sun in NE) | 734.847,-734,847,600.0 | 4124.541,1809.5,-284.544 |
| #2 (sun low to the west) | -1127.631,0.0,410.425 | -1462.893,1240.86,1920.0 |
| #3 (sun in SW) | -695.073,-695.074,688.292 | -165.219,2071.876,-165.222 |
For those of you who care to explore setting up your own custom lighting for Nationals tracks, here is the formula you need to convert your Max light position in the correct coordinates for use in the game:
D3D_X = ( MAX_X * 3.0) + 1920
D3D_Y = (MAX_Z * 3.0)
D3D_Z = (MAX_Y * 3.0) + 1920
Use one of the following presets for Quarry style tracks (7x7's)
|
Stunt Quarry Presets |
3D Studio Coordinates |
Direct 3D Coordinates |
| #1 (sun in SE) | 734.847, -734.847, 600.0 | 4892.541,1800.0,483.459 |
| #2 (sun in SW) | -900.0, -519.615, 600.0 | -12.0,1800.0,1129.155 |
| #3 (sun in east) | 1127.631, 0.0, 410.425 | 6070.893, 1231.275, 2688.0 |
For those of you who care to explore setting up your own custom lighting for Stunt Quarries, here is the formula you need to convert your Max light position in the correct coordinates for use in the game:
D3D_X = ( MAX_X * 3.0) + 2688
D3D_Y = (MAX_Z * 3.0)
D3D_Z = (MAX_Y * 3.0) + 2688
If you decide to set up your own lighting:
- Keep your light at a distance of about 1000 - 1500 feet from the terrain in Max. This
will translate into about 3000 - 4500 feet from the terrain the game.
- Keep the light at a very high angle in the sky. Lighting near sunrise or sunset, where
the sun is very low in the sky will NOT work well in the game.
- The one track in the game where the sun appears to be very low on the horizon,
Paradise
Lost, is an illusion. The visible sun in the sky is very low on the horizon, the 3D
position of the sun that is used to calculate the shadows is actually very high in the
sky. If you eye ball the shadow of the rider in Paradise Lost, you will notice that the
sun you can see in the sky could not possibly cast the shadow of the rider, unless light
can bend!
- If you place your light to close to the terrain, the amount of parallax will cause
the
shadows in the game to only be accurate near the center of the terrain.
- If you place the light too far away, the low spatial resolution of the texture map that we render the bike and rider shadow into during the game will become too low resolution and the rider's shadow will become quite blocky and not look acceptable.