Photoshop Painting Technique Tutorial
This topic is written by Brian Gillies, Lead Artist on Motocross Madness. The purpose of the document is NOT to teach you how to use Photoshop. The goal is to illustrate the painting techniques used to achieve high quality displacement maps. In this article, Brian makes reference to Dave Dwire, who is another of the Rainbow artists responsible for the creation of the outdoor terrain.
- - - - - - - - - -
The techniques that Dave and I use to paint displacement maps are really different from each other. But both are basically done by freehand painting and by understanding how lighter grays will be higher in the terrain and darker grays will be lower. We’ve tried using standard gradient tools and even building models with gradients in a 3D modeler and rendering them from the top, but freehand painting gives us the best results. The tracks I designed (Augusta Park, Pitfall, Skylane, etc.) use this method:
Starting with a new 512 x 512 image, I lay out the path of the new track in black, on a white background, with about a 35-pixel brush (sharp edge). I make sure the path is just the way I want it, because if I want to make changes later, I have to start over. Then I blur the whole image (3-4 pixel radius), to make a soft gradient on the edge of the track. This image gets moved into the alpha channel, where it’ll be used as a selection tool.
Sample Image: alpha for use as a selection tool

Now that I have the path, I create a new layer called ‘Grass’. I ctrl+click the alpha channel, and fill the selection with about a 30% gray (I can lighten or darken this later) to form the flat grassy area outside the track. This layer will always be on top.
On the Background layer, I fill the whole thing with 10-15% gray, so it will displace a little lower than the surrounding grass. Right now, I could use this image to make a completely flat track.
On a new layer between the Background layer and ‘Grass’, I start painting jumps using the airbrush tool. I paint using pure white, at 1% pressure. At this rate, it takes a lot of strokes to get up to a light color, but it gives a lot better control. I use the lasso tool to select one stretch of the track at a time, leaving room on the left and right sides. I start each stroke way off the track, carry it through, and stop way off the other side, so it’s even (this is a lot easier with a digitizing pad and stylus).
Download a sample PSD file: [http://www.rainbo.com/motocross/editor/images/sample01.psd] sample01.psd (right-click...save as)
|
Jumps on top of background layer |
Grass layer |
|
|
|
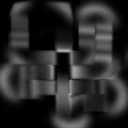

Most jumps work best when they’re concave, so I use a small brush with the white paint – about 20 pixels. I go across the highest point over and over again, and feather it out in both directions (especially the side that the bike will go up). I want all the inclines to be soft gradients, so if I see a sudden change in brightness anywhere, I want to smooth it out (otherwise it’ll be a really bumpy ride). Then I switch the color to black (still 1% pressure), and feather the bottoms of the jumps with a bigger brush, typically 45-65 pixels. Using a big black brush with a small white brush will make a low incline at the bottom and a sharper incline at the top – a concave jump.
NOTE: Putting the landing ramp on a different layer than the jump will make it easier to adjust the distance between the two while tuning the track. Jumps are usually higher than landing ramps, so the top of a jump will be a lighter gray.
A tabletop can be painted by selecting a gray that’s a little lighter than the track is, and painting with a big brush for feathered edges, at 100% pressure.
Bowl-shaped hairpin turns are done with a big brush, painting a soft white gradient around the outside edge. The same works for 90-degree turns.
Now that the whole track is filled with stuff, the last thing I do is run a Gaussian blur, with a 4-pixel radius, over the whole thing (if I don’t, the bike will bounce all over the place). Then I save a copy in the form of a targa. The targa is what I use to displace the grid in 3D Studio MAX. I output my .asc file and run Maketerr.exe to turn it into a playable track.
After testing in gameplay, I always want to make changes. Since I already blurred the jumps once, I make sure the new modifications are painted on a new layer. Then I blur that layer, save a targa copy, and test it in gameplay again. I do this again and again, painting each new set of changes on its own layer and blurring it, to fine-tune the jumps. When it’s finished, I merge all the layers that contain jumps, keeping the Background layer and ‘Grass’ separate. By archiving this .psd file, I can go back and change it again in the future.
Painting nationals on a hill
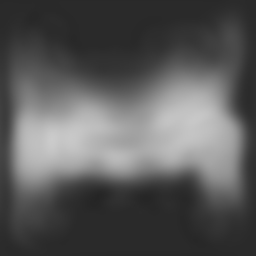
Tracks like ‘Bela’s Bluegrass’ and ‘Megadrive Blues’ are a little different. The alpha channel is exactly the same, but once that’s finished, I paint the shape of the hill I want, freehand, on the Background layer and blur it (if I used the map right now, I would get my hill with no track).
Sample image:Alpha channel for use as a selection tool

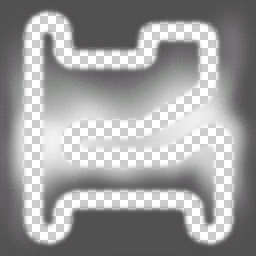
I duplicate the layer and name the new one ‘Grass’ – on this layer, I ctrl+click the alpha channel, do a Select/Invert, and delete the selection to create a hole in the shape of my track. Then I go back to the Background layer and lower its brightness by about 20-30 points. Now I have a hill with a track dug a few feet lower, but following the exact same contours of the land.
|
Background layer (basis for the hills) |
Grass layer (lighter than background) |
|
|
|
The job isn’t quite finished, though. In most cases, I want the track to be level across its width, and if it’s on a hill it probably isn’t. My traction, especially during cornering, is going to be terrible. The solution to this is just tuning – I lighten and darken here and there (on a new layer) until each part of the track has the same gray value across its width. Then I blur the changes and merge them with the Background layer. Now I’m ready to create new layers (between the Background and ‘Grass’) for my jumps, just like on the flat nationals.
|
Wrong: outside of curve is lower than inside. Bike won't corner properly. |
Right: curve is banked properly with outside higher than the inside of the turn. Don't make your banks too steep or the physics model will not like it. |
|
|
|

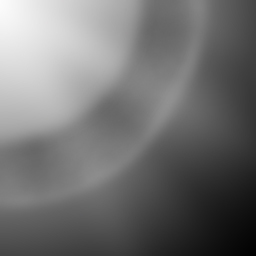
On all displacement maps, the pixels on the outer border need to be all the same gray value, so it’s perfectly flat. This way, it’ll line up with the rest of the terrain in the scene. The last thing I do to a track is paint a few rolling hills over the grass areas, and feather the edges out to one flat gray value. When this is done, the displacement map is finished.
Of course, every track is a special case, so I constantly invent new techniques as I go. But I use this method to get started on each one, and then as unique problems show up, find a way to solve them. The best way to learn what works and what doesn’t is to try lots of different shapes, and get familiar with the bike’s behavior on each one – it just comes with experience.
-Brian
p.s. If you come up with some hot painting techniques of your own, feel free to share them with the rest of us... send mail to: mcmsuggestions@rainbo.com